Tutorial: Keyword Tagging in Apple Final Cut Pro X
In this first installment of our new tutorial series, Glen Elliott demystifies Final Cut Pro X, illustrates its core functions, and focuses on one of the most powerful new features for organizing, accelerating, and streamlining your edits: metadata keyword tagging.
Working With Keyworded Collections
By keywording all the clips we're going to use and rejecting the others, we've organized our project into smaller, more manageable sections. If you used the deductive method and selected No Ratings or Keywords, you won't have any clips showing in the Event Library, and you'll get the message shown in Figure 14 (below)
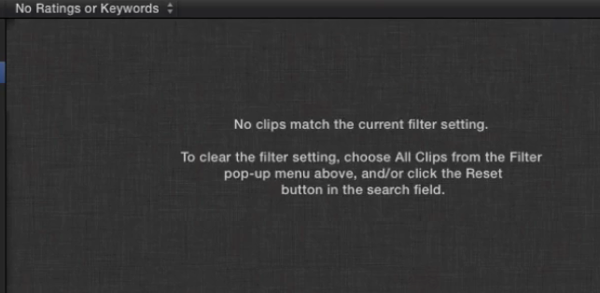
Figure 14. If all your clips are rated/keyworded and you have No Ratings or Keywords selected, you'll see an empty window with this message. You'll need to be sure to select All Clips to see your clips again.
Now we have our keyword collection for b-roll and our keyword collection for talking heads (Figure 15, below). At any time, you can click on your original event to see all of your footage on one screen.
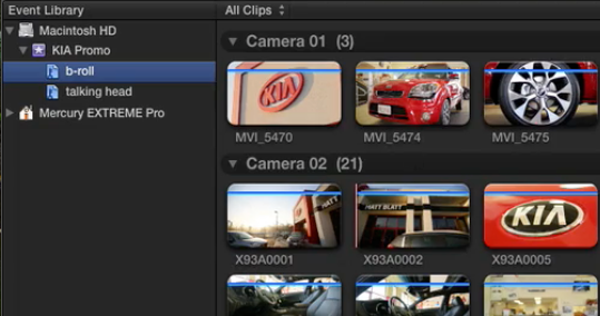
Figure 15. Our two keyword collections in the Event Library
If you highlight one of your keyword collections and hit Delete, it doesn't delete the footage; it just deletes the keyword collection. If I hit Command+Delete, it looks like all the b-roll disappeared, but it's still here; it just doesn't have keyword clusters--the blue line is missing.
Applying More Detailed Keywording
Next, I'm going to use this opportunity to show you how you can even do more detailed keywording. Let's say we wanted to differentiate the outdoor shots from the indoor shots. To begin, highlight all the b-roll from the outdoors, as shown in Figure 16 (below).
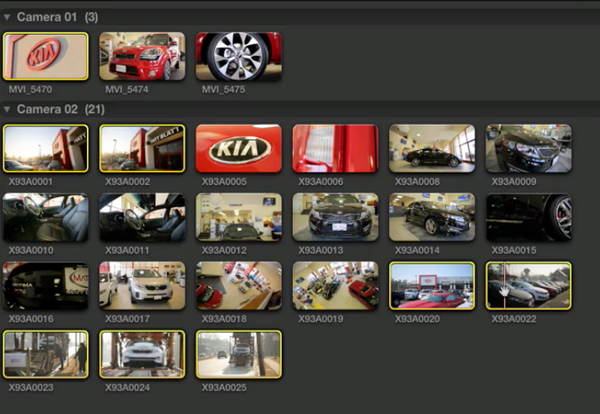
Figure 16. Selecting all the outdoor clips
Press Command+K to open the Keywords for selection dialog, and type "outdoor b-roll" in the keyword field. All of these clips are now tagged as outdoor b-roll (Figure 17, below).
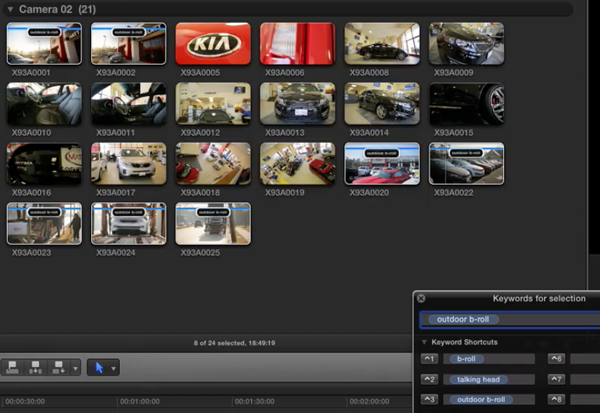
Figure 17. Tagging all the outdoor b-roll clips
Next, we'll name the rest of the clips "indoor b-roll," and we'll have two keyword collections, "indoor b-roll" and "outdoor b-roll." You can even drill down and be more detailed. For example, in this promo, we could break it down by car by selecting all the shots of the Kia Optima and keywording them as Kia Optima clips using the same process described above. Same with the Kia Sorento and the Kia Soul. Or we could tag all the outdoor establishing shots, or wide shots of the showroom, car delivery shots, and so on. We can group the car delivery shots with the outdoor establishing shots. And this is the Kia Sorento. So now, we have multiple keyword collections in more detail (Figure 18, below).
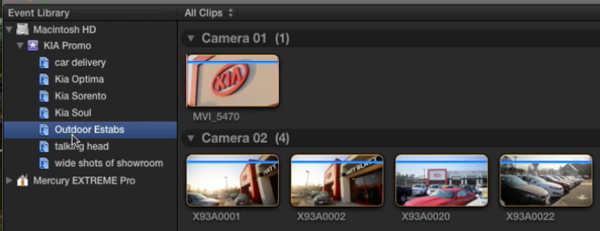
Figure 18. Multiple keyword collections
So you can really drill down and make it really detailed. This is how I work, especially with more complex projects.
Related Articles
Here's a look at two workflows for applying film grain to your footage in FCP X using cineLook (with and without Gorilla Grain), first with 4k footage shot with the Blackmagic Production Camera, and then with Cinestyle-flattened DSLR footage.
In our first tutorial on the recently released FCP 10.1, we look at the new Libraries feature, which enhances project and media organization and eases the adjustment for editors transitioning from FCP 7.
This tutorial on Apple Final Cut Pro X takes a closer look at color correction in the Inspector, exploring the Balance Color, Match Color, and Color Mask and Shape Mask features.
This tutorial on Apple Final Cut Pro X inspects the Video Inspector, a context-sensitive area of the FCP X interface that allows you to change settings of various filters and settings, and focuses on making basic but effective color adjustments.
In this video tutorial Glen Elliott of Cord3Films looks at FCP X's Timeline Index which provides innovative options for viewing, navigating, and searching your projects, including three different types of timeline markers and the ability to create a navigable To Do list of editing notes that's indispensable for collaborative workflows.
In this tutorial, Cord3Films' Glen Elliott demonstrates how to mix audio from multiple off-camera sources in a multicam edit in Apple Final Cut Pro X.
In part 2 of our series on multicam editing in Final Cut Pro X, Glen Elliott explains how you can accelerate and streamline the multicam-syncing process in Red Giant's PluralEyes 3.
Our Final Cut Pro X tutorial series continues with the first installment of a 3-part series on multicam editing in FCP X, addressing the basics like creating a multicam clip and cutting and switching audio and video using the Angle Editor.
Working with compound clips in FCP X is similar to nesting sequences in Final Cut Pro 7. Once you understand how it works, and how changes to compound clips can ripple across projects, it's a powerful feature that you'll find yourself using more and more.
In this tutorial, we'll look at several ways you can use connected storylines to enhance your FCP X edits and mix in cutaways and creative shots in a quick and efficient way.
This tutorial explores advanced editing techniques in FCP X including back-timing your edits, replacing edits and auditioning, top-and-tail editing, extend edits, trim-to-selection edits, keyboard trimming, and the Precision Editor.
The magnetic timeline is one of the major revolutionary changes in Apple Final Cut Pro X, and one of the areas editors struggle with when they're coming from track-based NLEs. In this tutorial we'll break it down and show you how to make it work for you.
No matter how fast, efficient, and determined a 48 Hour Film Project production team is, they need to finish strong with a streamlined edit. Final.revised editor Scott Strimple describes how Apple Final Cut Pro X allowed him to deliver the goods on deadline, by leveraging key features that could make any edit cook.
The 48 Hour Film Project offers filmmakers a chance at fame and glory and unleashed creativity, along with the insanity of producing a film from pre to post in two days. Scott Strimple, editor of award-winning 48HFP entries two years running, recounts what it was like putting together this year's film. In Part 2 he'll discuss the instrumental role Apple Final Cut Pro X played in editing and delivering the film with a cool 9 minutes to spare.
Background noise and pops and clicks in audio are an unfortunate fact of life for many productions. In this tutorial we'll explore some fixes you can try in Final Cut Pro X.
One of the most convenient new features in Final Cut Pro 10.0.6 is the ability to quickly and easily export to a single destination, or a bundle of destinations, that contain multiple outputs. In this tutorial, you learn how to create a single destination and a bundle of destinations.
The histogram and the waveform in Apple Final Cut Pro X are effective, easy-to-master tools that provide the clear input you need to diagnose and fix the contrast issues in your video simply and intelligently. In this video tutorial, video editing and encoding expert Jan Ozer explains how they work.