Tutorial: Bundling Destinations for Multiple Exports in Apple Final Cut Pro X
One of the most convenient new features in Final Cut Pro 10.0.6 is the ability to quickly and easily export to a single destination, or a bundle of destinations, that contain multiple outputs. In this tutorial, you learn how to create a single destination and a bundle of destinations.
One of the most convenient new features in Final Cut Pro 10.0.6 is the ability to quickly and easily export to a single destination, or a bundle of destinations, that contain multiple outputs. In this tutorial, you learn how to create a single destination and a bundle of destinations.
Adding a Destination
In this tutorial I'll work with a project I just completed. It's a personal project from a recent trip to New Orleans, and I want to send it off to three different locations. I want to send it to Vimeo and to YouTube, and I want to create a file I can use on my iPad.
To begin exporting a file to multiple destinations, select a project, and click File > Share > Add Destination (Figure 1, below).
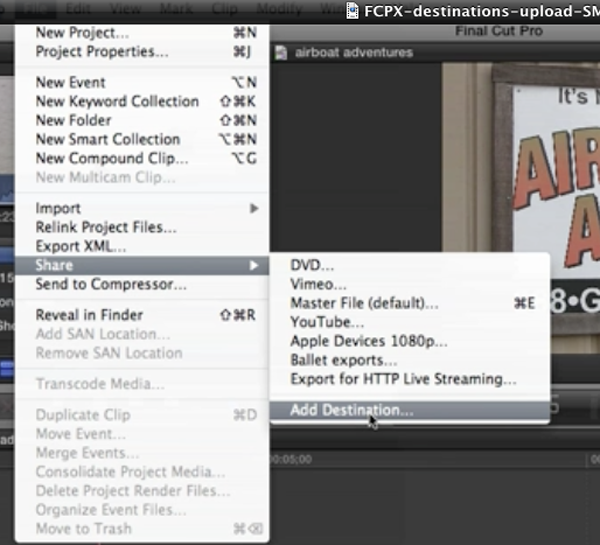
Figure 1. Adding a new Destination
The options you see in Figure 1 are Destinations that I've already created. There's a bundle of ballet exports that I used for a recent ballet production. And there are options for YouTube, Vimeo, DVD, and so on.
When you click Add Destination, you can create a destination from any of the canned presets available in the Destinations window shown in Figure 2 (below). You can create one for a CNN iReport, you can create one for Facebook, one for Vimeo, and you can also create bundles by clicking the Bundle icon in the lower left.
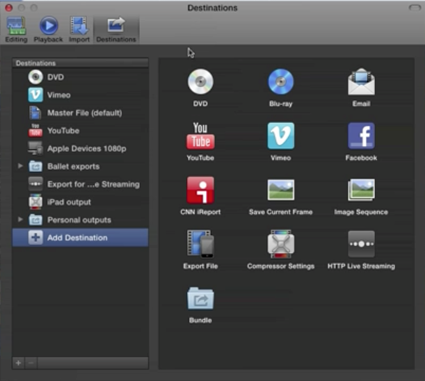
Figure 2. FCP X's Destinations window features an array of available presets that you can modify as you choose.
Let's start by creating a single output preset for my iPad, which I'm going to use over and over again. To begin, double-click Compressor Settings (Figure 3, below).
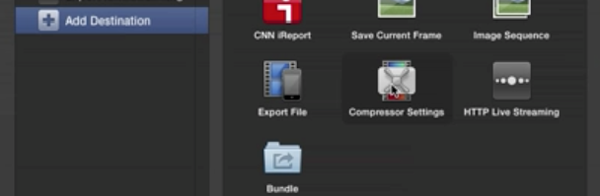
Figure 3. Double-clicking to select Compressor Settings in the Destinations window
This opens up a new dialog where you have access to any of the presets that come with Compressor as well as any of your own custom presets that you may have previously created (Figure 4, below).
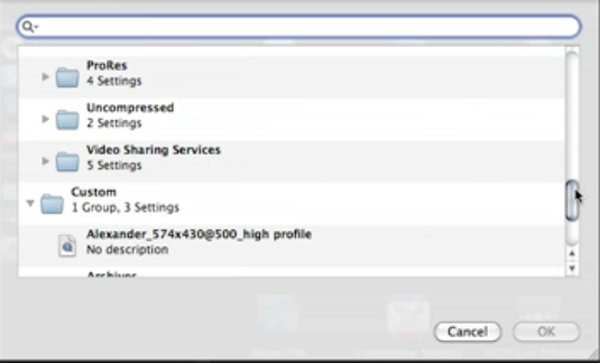
Figure 4. Compressor presets
To create an iPad preset, choose Apple Devices > HD for Apple Devices (10 Mbps) (as shown in Figure 5, below), and click OK.
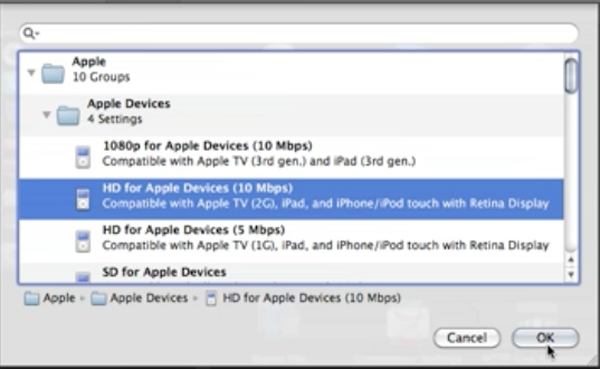
Figure 5. Choosing an HD for Apple Devices preset from the Compressor Settings dialog
The preset appears in your Destinations folder (Figure 6, below).
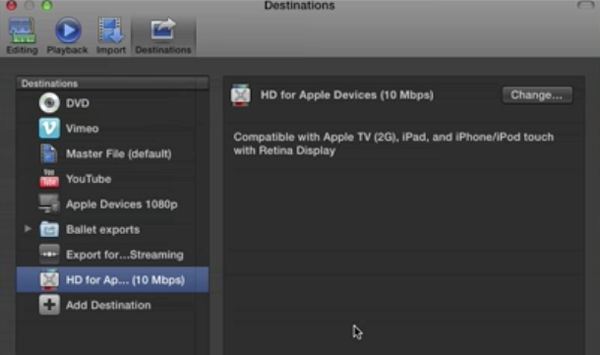
Figure 6. The HD for Apple Devices preset added to the Destinations folder
Related Articles
In this first installment of our new tutorial series, Glen Elliott demystifies Final Cut Pro X, illustrates its core functions, and focuses on one of the most powerful new features for organizing, accelerating, and streamlining your edits: metadata keyword tagging.
Background noise and pops and clicks in audio are an unfortunate fact of life for many productions. In this tutorial we'll explore some fixes you can try in Final Cut Pro X.