Tutorial: Inspecting the Inspector in Final Cut Pro X, Pt. 1
This tutorial on Apple Final Cut Pro X inspects the Video Inspector, a context-sensitive area of the FCP X interface that allows you to change settings of various filters and settings, and focuses on making basic but effective color adjustments.
In this tutorial on Apple Final Cut Pro X we’re going to be inspecting the Inspector, a context-sensitive area of Final Cut Pro X that allows you to change settings of various filters and settings.
To tell FCP X to show the Inspector, click on the icon second from the right in the panel just above the timeline. It looks like a bunch of sliders with knobs on it, and it toggles on and off when you click it (Figure 1, below). You can also show or hide the Inspector by using the keyboard shortcut Command+4.

Figure 1. Click this icon to toggle the Inspector on or off. (Click on this image--or any screenshot in this article--to see a full-size version in a new window.)
Working in the Color Area
To inspect the Inspector (Figure 2, below), we’ll start from the top and work our way down. In this tutorial we’re going to focus on the Color area. This is the area of the Inspector you’ll use the most.

Figure 2. The Effects and Color sections of the Final Cut Pro X Inspector.
Right above the Color area you see there is one other section: the Effects section. That one will populate with effects as you add them from the Effects palette. So if you grab an Effect and drag it onto a clip, it will populate this Effects area. But as I mentioned before, we’ll concern ourselves primarily with the Color area in this tutorial.
Before we get started, it’s important to understand timeline cursor behavior in selections and how they work. If nothing is selected on my timeline, whatever clip the timeline cursor is over will actually be automatically be loaded into the Inspector. Let’s say I want to make a color adjustment. I click the arrow for Correction 1, as shown in Figure 3 (below). In the Color Adjustment panel for Correction 1, I go to Saturation, and drag the saturation down. As you can see in Figure 4 (below Figure 3), it goes into black and white.

Figure 3. Opening the Color Adjustment panel.
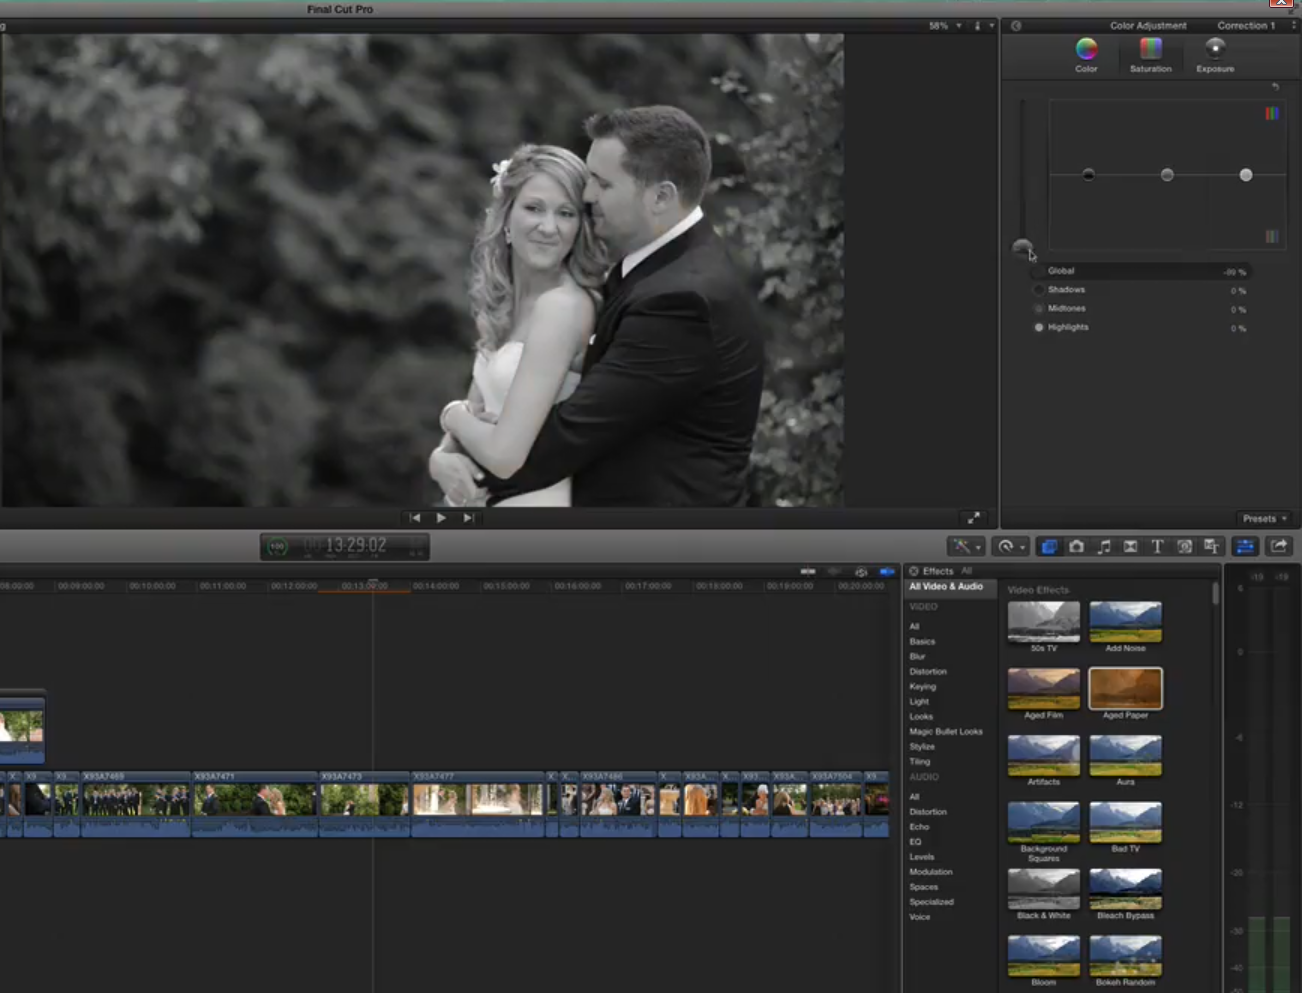
Figure 4. Making a color adjustment to the clip at the timeline cursor (with no other clip selected) by dragging the Saturation slider in the Color section of the Inspector.
But if I do the same thing with the clip before it selected, the clip at the timeline cursor (and shown in the preview window) will not be affected. The adjustment we’re making is applied to the selected clip, which happens to be the one next to the clip currently in the preview window. The moral of the story is, make sure whatever clip you’re working on is selected.
One way to make sure you’re adjusting the same clip you’re seeing is to hit the C key on your keyboard as it’s playing and it’ll automatically select whatever clip is below the timeline cursor.
Now let’s say you want to do some work on a specific clip that doesn’t happen to be under the timeline cursor. Click it and highlight it to load it into the Inspector. If you go into the Inspector and start making changes, you’ll notice nothing’s changing. The reason is because the timeline cursor is elsewhere, and we’re viewing the clip under the timeline cursor, not the on selected for adjustments. So as you drag the sliders in the Color Adjustment panel, you’re making changes to the clip that you selected, but you’re not seeing them previewed because the timeline cursor is on a different clip in the timeline.
One way to quickly highlight a clip and have the timeline cursor move at the same time is hold down the Option key and click it, and Final Cut Pro X will move your timeline cursor there as well. That way it’s selected, it’s queued up, and it’s loading that clip to the Inspector, plus your timeline cursor is lined up so you’re actually viewing the changes in real time as well, instead of viewing another part of the timeline.
Related Articles
Here's a look at two workflows for applying film grain to your footage in FCP X using cineLook (with and without Gorilla Grain), first with 4k footage shot with the Blackmagic Production Camera, and then with Cinestyle-flattened DSLR footage.
In our first tutorial on the recently released FCP 10.1, we look at the new Libraries feature, which enhances project and media organization and eases the adjustment for editors transitioning from FCP 7.
This tutorial on Apple Final Cut Pro X takes a closer look at color correction in the Inspector, exploring the Balance Color, Match Color, and Color Mask and Shape Mask features.
In this video tutorial Glen Elliott of Cord3Films looks at FCP X's Timeline Index which provides innovative options for viewing, navigating, and searching your projects, including three different types of timeline markers and the ability to create a navigable To Do list of editing notes that's indispensable for collaborative workflows.
In this tutorial, Cord3Films' Glen Elliott demonstrates how to mix audio from multiple off-camera sources in a multicam edit in Apple Final Cut Pro X.
In part 2 of our series on multicam editing in Final Cut Pro X, Glen Elliott explains how you can accelerate and streamline the multicam-syncing process in Red Giant's PluralEyes 3.
Our Final Cut Pro X tutorial series continues with the first installment of a 3-part series on multicam editing in FCP X, addressing the basics like creating a multicam clip and cutting and switching audio and video using the Angle Editor.
Working with compound clips in FCP X is similar to nesting sequences in Final Cut Pro 7. Once you understand how it works, and how changes to compound clips can ripple across projects, it's a powerful feature that you'll find yourself using more and more.
In this tutorial, we'll look at several ways you can use connected storylines to enhance your FCP X edits and mix in cutaways and creative shots in a quick and efficient way.
This tutorial explores advanced editing techniques in FCP X including back-timing your edits, replacing edits and auditioning, top-and-tail editing, extend edits, trim-to-selection edits, keyboard trimming, and the Precision Editor.
The magnetic timeline is one of the major revolutionary changes in Apple Final Cut Pro X, and one of the areas editors struggle with when they're coming from track-based NLEs. In this tutorial we'll break it down and show you how to make it work for you.
In this first installment of our new tutorial series, Glen Elliott demystifies Final Cut Pro X, illustrates its core functions, and focuses on one of the most powerful new features for organizing, accelerating, and streamlining your edits: metadata keyword tagging.