Tutorial: Advanced Editing Techniques in Apple FCP X
This tutorial explores advanced editing techniques in FCP X including back-timing your edits, replacing edits and auditioning, top-and-tail editing, extend edits, trim-to-selection edits, keyboard trimming, and the Precision Editor.
Extend Edit
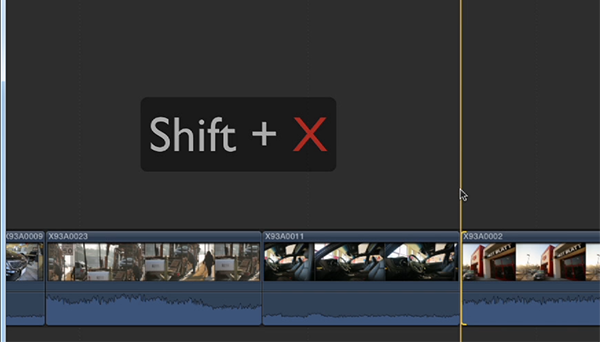
There's another edit available that's pretty similar. It's called the extend edit. The extend edit allows you to move any edit point to the location of the timeline cursor. Choose the In point of a clip, move the cursor to the right, and hit Shift+X to perform an extend edit. The In point ripples to the location of the timeline cursor (Figure 13, below).

Figure 13. Hit Shift+X to perform an extend edit and ripple the In point to where the cursor is in a single click.
Likewise, if we move the cursor to the left of the edit point, and hit Shift+X, it's going to ripple it out.
It works with rolls as well. If you hit the Trim tool, highlight both the In and the Out point, move our cursor down, and hit Shift+X, it's just going to roll that edit point to the timeline cursor location.
Likewise, if we highlight an edit point with the position tool, move our cursor inward, hit Shift/X, it's going to ripple it in, but it's going to move it just like you would if you had the position tool highlighted and it'll leave a gap behind.
Keyboard Trimming
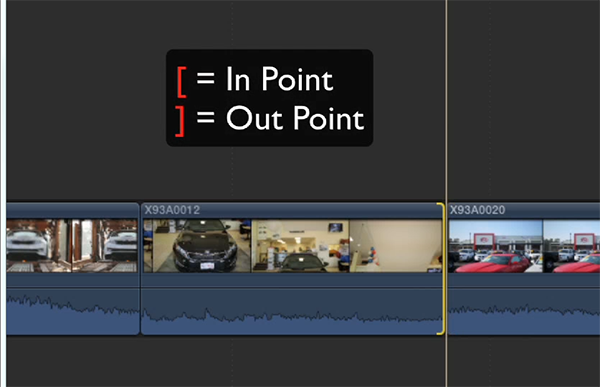
There's even a way to trim your timeline up without even touching your mouse. If you press the up and down arrow keys, that'll take you from the previous edit point to the next edit point, respectively. Now once you're on an edit point, you can press the left or right bracket key to choose the In or Out point. It's easy to remember, because it actually looks like a bracket key highlighting (Figure 14, below).

Figure 14. Once you’re on an edit point, hit the left or right bracket key to choose the adjacent In or Out point.
If you choose the end point of a clip, and press the period key on your keyboard, it's going to ripple it in to the right, one frame at a time. Press the comma key (adjacent to the period), it's going to ripple it outward, or to the left, with every keyboard press. If you use the Shift modifier key and tap it, it's going to move that edit point ten frames instead of one frame. So each time, it's a much bigger move here. And likewise, if you hit the left bracket key, it'll select the Out point of the previous clip, and you can trim that the same way with the modifier keys.
You can also do a roll edit with these keyboard trimming shortcuts. To the right of the bracket keys on your keyboard there's a backslash key. If you hit the backslash key, it'll select both sides of the edit, and then once you use the comma and period keys, it's actually going to do a roll edit back and forth. So it's a pretty quick and intuitive way to snap around your timeline and make trims as necessary.
If you hit the left bracket key and see that the bracket is actually red, that denotes that there's no more available footage on that particular clip. So this is the very last frame of that clip. So if you try to, say, ripple it to the right, it won't let you, because there's no available media. But of course, you could ripple it inwards to the left.
The Precision Editor
The last thing we’ll look at in this tutorial is the Precision Editor. As you know, you can use the trim tool, highlight an edit point, and roll it back and forth. Or use the selection tool, and ripple an edit point back and forth. But there's also another way.
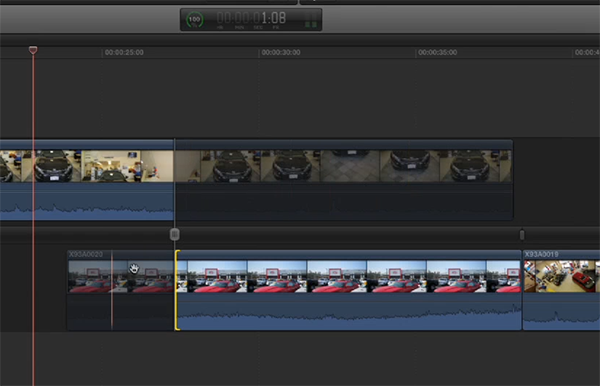
If you double-click an edit point, you'll open up the Precision Editor (Figure 15, below). And what you're going to see is that it splits in half, and allows you to see the handles of the clip, or the unused portions of each clip in a dark gray area, which is really cool because you can scroll through here and see what you have without actually rippling it out and using it.

Figure 15. The Precision Editor
So you can go ahead and move your cursor to where you feel the clip should have ended, and just click, and it'll ripple the clip to that point. You can also, conversely, grab the edge and ripple back and forth for each portion. This method allows you to see, again, all of the available media, or the handles. You can grab the gray area in the center to do a roll edit.
Once you're done with the edit, you can either double-click or hit Escape to exit the Precision Editor, or you can stay in it and actually go through your edit and fine-tune it this way by hitting the up and down arrow keys to go from edit point to edit point. It's a really visual way to tune up your edit.
So there are some more advanced editing techniques inside the FCP X timeline. I suggest taking the time to experiment with several of these tools and find which ones work for you in your worflow, and help you speed up your editing.
Related Articles
Here's a look at two workflows for applying film grain to your footage in FCP X using cineLook (with and without Gorilla Grain), first with 4k footage shot with the Blackmagic Production Camera, and then with Cinestyle-flattened DSLR footage.
In our first tutorial on the recently released FCP 10.1, we look at the new Libraries feature, which enhances project and media organization and eases the adjustment for editors transitioning from FCP 7.
This tutorial on Apple Final Cut Pro X takes a closer look at color correction in the Inspector, exploring the Balance Color, Match Color, and Color Mask and Shape Mask features.
This tutorial on Apple Final Cut Pro X inspects the Video Inspector, a context-sensitive area of the FCP X interface that allows you to change settings of various filters and settings, and focuses on making basic but effective color adjustments.
In this video tutorial Glen Elliott of Cord3Films looks at FCP X's Timeline Index which provides innovative options for viewing, navigating, and searching your projects, including three different types of timeline markers and the ability to create a navigable To Do list of editing notes that's indispensable for collaborative workflows.
In this tutorial, Cord3Films' Glen Elliott demonstrates how to mix audio from multiple off-camera sources in a multicam edit in Apple Final Cut Pro X.
In part 2 of our series on multicam editing in Final Cut Pro X, Glen Elliott explains how you can accelerate and streamline the multicam-syncing process in Red Giant's PluralEyes 3.
Our Final Cut Pro X tutorial series continues with the first installment of a 3-part series on multicam editing in FCP X, addressing the basics like creating a multicam clip and cutting and switching audio and video using the Angle Editor.
Working with compound clips in FCP X is similar to nesting sequences in Final Cut Pro 7. Once you understand how it works, and how changes to compound clips can ripple across projects, it's a powerful feature that you'll find yourself using more and more.
In this tutorial, we'll look at several ways you can use connected storylines to enhance your FCP X edits and mix in cutaways and creative shots in a quick and efficient way.
The magnetic timeline is one of the major revolutionary changes in Apple Final Cut Pro X, and one of the areas editors struggle with when they're coming from track-based NLEs. In this tutorial we'll break it down and show you how to make it work for you.
In this first installment of our new tutorial series, Glen Elliott demystifies Final Cut Pro X, illustrates its core functions, and focuses on one of the most powerful new features for organizing, accelerating, and streamlining your edits: metadata keyword tagging.