Tutorial: Configuring ViewCast Osprey 820e for a Live-Switched Wirecast Webcast
This tutorial describes how to install and configure ViewCast's dual-channel Osprey 820e card ($1,795 MSRP; as low as $1,400 street) into a Windows system for driving two cameras within Telestream Wirecast, and discusses the board's highly functional set of utilities and SimulStream feature, which allows it to feed audio and video streams to more than one encoding application.
1. Configure the first video input
Let's configure the two video inputs first, then the audio. In the upper-left corner, choose the top Osprey card. Then choose Capture Device Size (1920x1080 in Figure 1, below), and click Configure. The Osprey Properties window opens. Note that if the video looks truncated or otherwise funky in the Wirecast preview window, it's probably because you didn't choose the right Capture Device Size in the list box. So return to the Source Settings dialog to input the right size and hopefully resolve the problem.
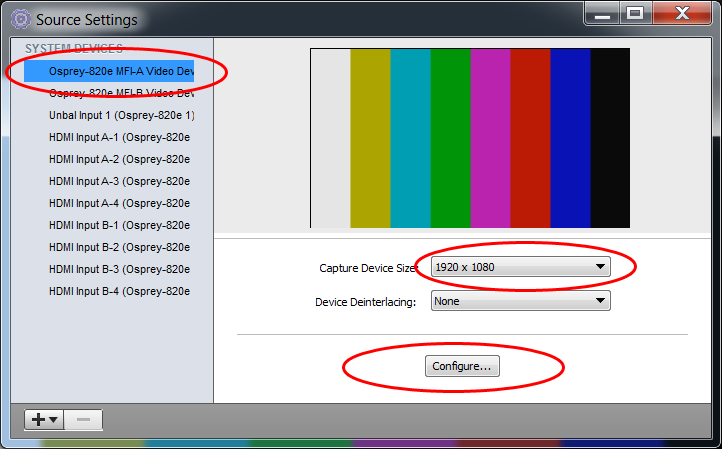
Figure 1. Accessing the 820e's configuration options in Wirecast.
2. Identify the first video input
Perhaps in the next version of the Properties window, the tab where you choose the correct input will be called "Input," or even "Choose input," but in this version, it was hidden under the tab entitled Crossbar (Figure 2, below). File this under "unintuitive, but once you know, you know, so get over it." Choose the appropriate input (Component Input 1 in this case) and click OK to return to the Source Settings dialog shown in Figure 1.
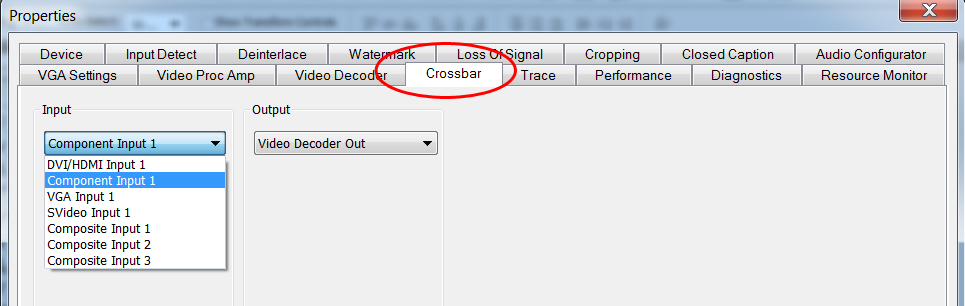
Figure 2. Identifying the source input in the Crossbar tab.
3. Check the signal
When I connected the Blackmagic Intensity Pro cards to my Canon XH A1 in 30F mode, the card saw 30i and I had to configure both the Blackmagic utility and Wirecast accordingly. So I was eager to see how the 820e read the signal. To do this, I clicked the Input Detect tab and saw that the board was seeing 540 lines, which meant interlaced content (Figure 3, below). So, I wanted to see if deinterlacing was necessary.
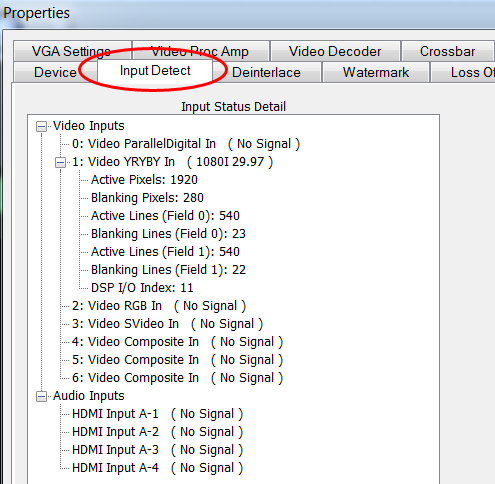
Figure 3. Checking the input signal of the XH A1 in 30F mode. Like the Blackmagic Intensity Pro, ViewCast sees it as interlaced.
4. Test deinterlacing
I clicked the Deinterlace tab in the Osprey Properties window, then selected Both in the Pin Type so deinterlacing would work during capture and preview. I clicked Start Preview on the bottom of the dialog to check the signal and didn't see any obvious interlacing; no surprise, since the XH A1 was in progressive mode. Still, I tested with and without deinterlacing enabled (using the Advanced option shown in Figure 4, below) and found the signal slightly clearer with deinterlacing enabled, so I used that in my tests.
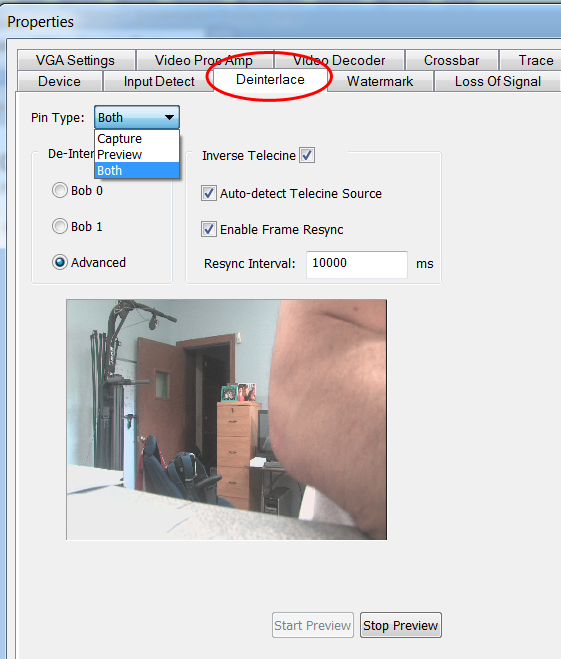
Figure 4. Enabling deinterlacing.
Related Articles
Streaming Media's Marc Franklin interviews Osprey Video CRO Scott Whitcomb on the showfloor at Streaming Media West 2022 about Osprey's Talon 12G hardware encoder and new integrations for cloud streaming.
Any time you produce a webinar that's got PowerPoint and a talking-head video, it's helpful to present them in the same video frame. This tutorial explains how to composite these two sources in Telestream Wirecast.
Streaming Media Producer kicks off its "What Is...?" series tackling essential topics in the streaming media production world with a look at live switching, touching on the differences between switching and mixing, assembling the components and crew of a live switch, and the basics of "punching" a multi-camera show or event for live delivery.
This is the first of a three-part tutorial on using Wirecast to mix two streams of video and other disk-based content. In this first tutorial, I'll describe how to install and configure two Blackmagic Design Intensity Pro cards into an HP Z600 for switching with Wirecast.