Tutorial: Creating and Editing Multicam Sequences in Final Cut Pro X
When Apple originally released Final Cut Pro 10, the biggest deficit for Pro users was the lack of multicam. With the 10.0.3 release, Apple has addressed this with a highly functional and easy-to-use multicam feature, which Jan Ozer explains in this tutorial.
Working with the Multicam Clip
Figure 9 (below) shows the multicam clip that was created, and if you double-click it, the clips open up separately in this window at the bottom of the UI. The clip from the soundboard is on top, and all the other clips are shown below.
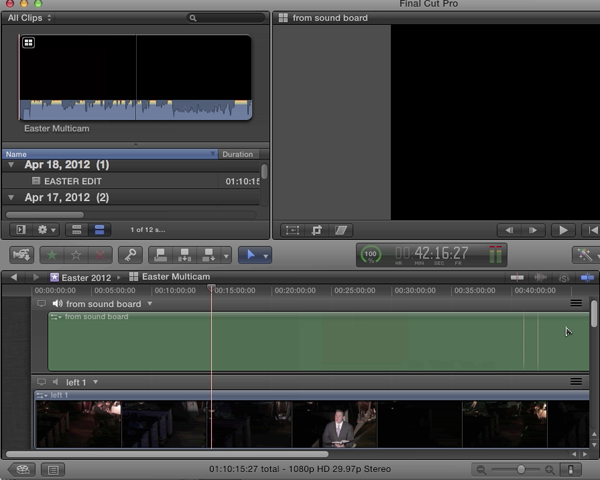
Figure 9. The Easter multicam clip
Now, if you have an effect that you want to apply to a clip as a whole—say, brightening or color adjustments—Figure 10 (below) is where you would apply it, and then the effect would follow through each time you use that particular camera angle.

Figure 10. Applying effects
Checking Video Sync
Now let's check the synchronization. We'll go to the 15-minute mark, and we're not going to see anything with the sound file. We're not going to see anything with the left camera angle, because that was focused on a subject who's not visible now (Figure 11, below).

Looking for a video track to check the sync. Nothing in the preview window from the left camera angle since its subject is not visible at this point.
If we click on the back camera clip, we see Jesus on the pulpit raising his arms to the heavens. If we scroll down to the front camera, we see the same thing, just a little bit closer, and if we scroll down to the DSLR shot, we see the same thing (Figure 12, below).
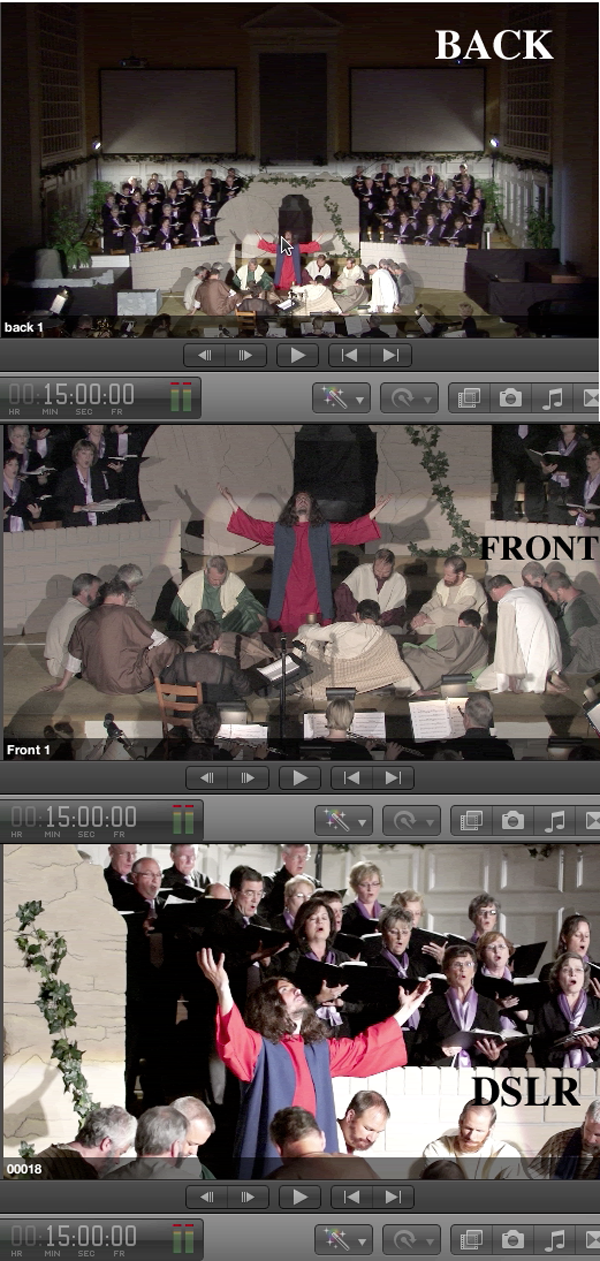
Top to bottom: back cam, front cam, and DSLR, all synced to the same moment in the production at the 15-minute mark of the multicam clip.
So, Final Cut Pro X successfully synchronized the multiple camera angles in this clip based upon the audio.
Editing the Multicam Clip
So let's get to editing this project. Start by making the preview window larger. We'll do our editing in this compound clip by dragging the multicam clip into that compound clip.
In this case, the default video angle is the soundboard track, so let's change to a video angle that's actually got some content. It will be helpful to start with the back so we can see what's going on over the course of the clip (Figure 13, below).
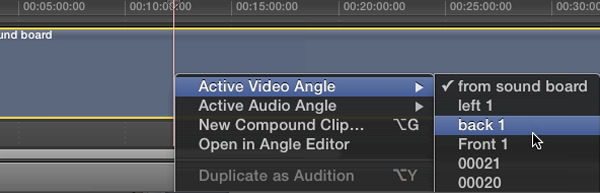
Choosing a video angle.
Next, open up the angle viewer from the Window menu option (Figure 14, below).
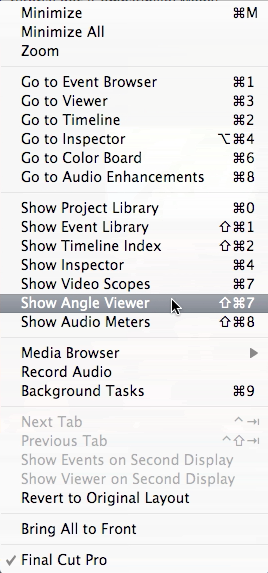
Opening the Angle Viewer.
Figure 15 (below) shows the various angles that you can edit.
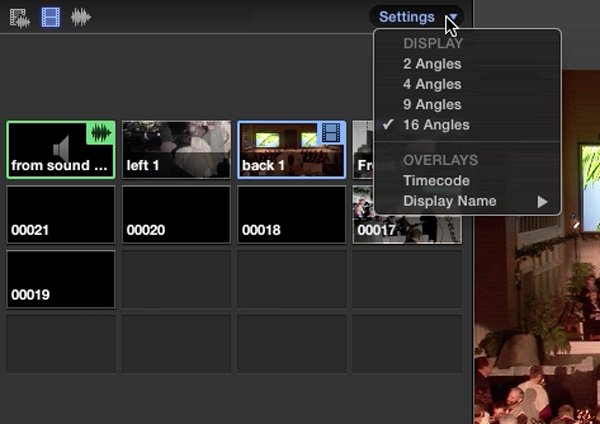
The Angle Viewer.
At the top of Figure 15 there are three icons here that control what happens when you change camera angles. If the one on the left is selected, you change both the video and the audio when you choose different angles during the production. If the one in the middle is selected, it's video only. Typically that's what you're going to want to do. Selecting the icon on the right gives you audio only, and that's not something that I've ever seen done, but I'm sure in some productions that might be useful.
Final Cut Pro X assumes that you want to use the audio-only track as background audio (note the green-and-black waveform icon in the upper-right corner of the sound board track thumbnail in Figure 15). In this case that's correct, so I'll leave that alone.
And at this point, all you do is what you did with Final Cut Pro 7—you play the file and then switch camera angles as desired. Once you've done your selections, you'll open up the timeline a bit, and review your choices (Figure 16, below).

Expanding the timeline to review the angle switches.
Related Articles
Background noise and pops and clicks in audio are an unfortunate fact of life for many productions. In this tutorial we'll explore some fixes you can try in Final Cut Pro X.
Jan Ozer sits down with Bill Roberts to discuss the trends impacting the future direction of Adobe Creative Suite for video pros, including the decline of 3D, the rise of 4K, and second-screen viewing. Other topics included the growth of Creative Cloud, and the development arc of Apple Final Cut Pro X.
The histogram and the waveform in Apple Final Cut Pro X are effective, easy-to-master tools that provide the clear input you need to diagnose and fix the contrast issues in your video simply and intelligently. In this video tutorial, video editing and encoding expert Jan Ozer explains how they work.