Tutorial: Using Adobe Stock with Adobe Premiere Pro CC
Adobe Stock is a massive, high-resolution stock photo, illustration, and vector library that allows for easy integration with Premiere Pro, Photoshop, After Effects, and other Adobe programs. In this tutorial we'll explore how Adobe Stock can work with Adobe Premiere Pro in our video projects.
In this quick tutorial, we’ll look at using Adobe Stock with Premiere Pro CC 2015. Adobe Stock was recently released in the 2015 update to the Adobe Creative Cloud.
In a nutshell, Adobe Stock a massive, high-resolution stock photo, illustration, and vector library (Figure 1, below) that allows for easy integration with Premiere Pro, Photoshop, After Effects, and other Adobe programs. Let’s take a few minutes to see how this can work with Adobe Premiere Pro in our video projects.

Figure 1. Search results in the Adobe Stock media library
Starting with Premiere Pro open, I’ve created a basic type title for this tutorial. It's already placed on the timeline (Figure 2, below). Now I'd like to add a nice image as a background for this.
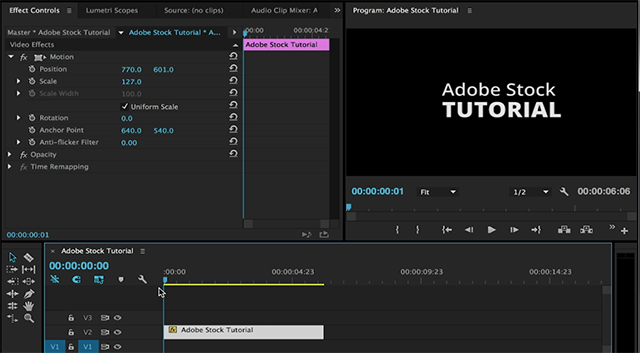
Figure 2. My basic type title in the Premiere Pro timeline
Accessing the Adobe Stock Library from Premiere Pro
You can access the Adobe Stock Library from Adobe Premiere Pro by choosing Window > Libraries (Figure 3, below). The Libraries panel opens.

Figure 3. Accessing Adobe Stock from the Premiere Pro Window menu
In the Libraries panel, you can access the Adobe Stock website by clicking the Stock icon in the bottom-right corner of the panel (Figure 4, below).

Figure 4. Click the Stock icon to launch the Adobe Stock Library.
This will launch the Adobe Stock Library in your web browser. Here you’ll want to make sure that you are signed in with your Adobe credentials.
Searching for and Acquiring an Image
Now you can type in whatever kind of image you are looking for. I'm going to search for some apples to add as a background for the type I created back in Premiere Pro (Figure 5, below).

Figure 5. Typing in a search term
I'll select an image from the results and then choose the Buy license & save to My Library option (Figure 6, below).

Figure 6. This will save the image I’ve chosen to My Library. Click the image to see it at full size.
If you're doing this for the very first time, Adobe will ask you if you'd like to save this to a specific library followed by sending you to a payment options page. From there, you'll be able to see the different plans that are available to you as a Creative Cloud user. Then Adobe will ask you to verify your payment method, which by default is the same payment method you used with your other Adobe purchases. Finally, you'll see a popup window to download your image.
Related Articles
In some scenes, particularly those with the static background, Adobe Premiere Pro CC's new Morph Cut transition will seamlessly eliminate jump cuts from your edit, but you may have to experiment to get there. This tutorial demonstrates how. Every editor who works with interviews will find this a great new tool that will make their footage look better and possibly eliminate the need to re-shoot.
The new Lumetri Color panel makes it simple to correct your footage and then creatively control the color with preset looks or your own adjustments. It's one of the best new additions in the Adobe Premiere Pro CC 2015 update.
This tutorial will describe a fog effect you can create to add some drama to your footage or alter the weather of your shot.
With the new Time Tuner feature in Premiere Pro, Adobe now makes it easy to adjust the length of a video to fit a specific requirement by adding or removing frames at scene changes, audio passages, and during periods of low visual activity.