Tutorial: Making the Right Audio Connections for Live and Corporate Video
In this article we'll walk through the process of connecting a camcorder to an external microphone or soundboard for optimum, clean, balanced audio capture--critical skills for any videographer or online video producer doing corporate video or live events.
The following article is an adapted excerpt from Jan Ozer's upcoming book, Producing Streaming Video for Multiple Screen Delivery, which has three chapters dedicated to live event production.--Ed.
Connecting your camcorder to an external microphone or soundboard is a critical skill for any event or corporate videographer, though it can be surprisingly challenging, making it an exercise best performed well in advance of the actual live event. In this article, I’ll walk you through the process, beginning with the assumption that your camcorder has XLR connectors and that your camcorder’s manual is handy.
First I’ll walk you through the process of connecting a microphone, then a soundboard. I’ll demonstrate connecting my Canon XH A1 to a battery-powered Azden shotgun microphone, but I’ll keep reminding you that while the procedure will be similar for most camcorders, the connections and settings will differ.
Connecting Microphone to Camcorder
Step 1. Physically connect the microphone to the camera
If you’re connecting two XLR inputs into the camera, this is simple: Insert the left cable into Channel 1, the right in Channel 2. If you’re connecting a single XLR connector, typically you want the audio to flow to both tracks. Even if you’re encoding in mono, this prevents errors like audio registering on only one side. In this case, with the XH A1, you would insert the cable into Channel 1 and use the switch shown in Figure 1 (below) to send the audio to both channels.
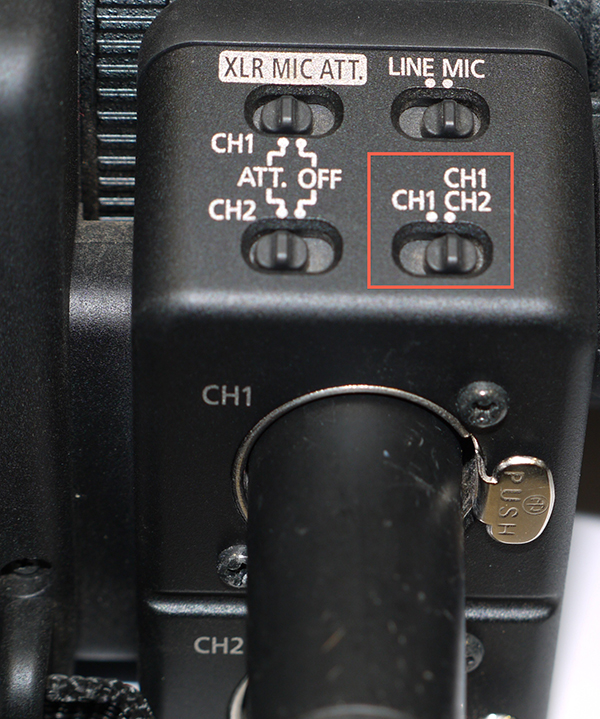
Figure 1. Telling the XH A1 to send the audio received from Channel 1 to both channels.
Interestingly, with my Panasonic HMC150, you’d insert the cable into Channel 2 and use a different control to send the audio to both channels. The critical bit here is that you should hear audio in both ears with the mandatory headphones and see audio in both tracks on the camcorder display.
Step 2. Turn on phantom power if the microphone needs power
The XH A1’s controls are in front of the XLR jacks as shown in Figure 2 (below). If you’re working with a microphone that supplies its own power, or a line feed from a soundboard, you would turn phantom power off. The Azden is battery powered, so I turned off Phantom Power.
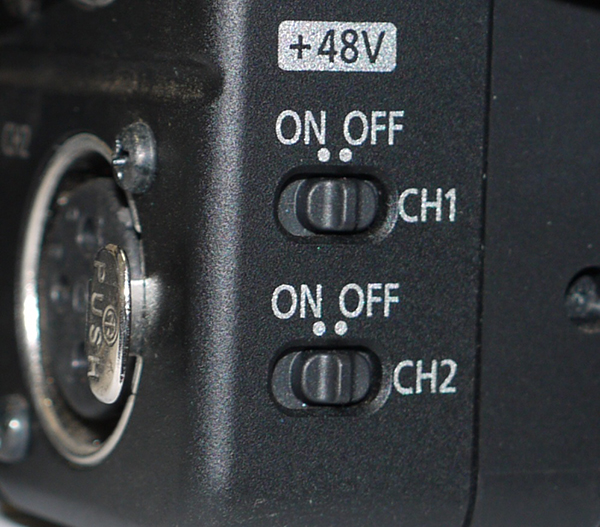
Figure 2. Here’s where you turn on phantom power when needed.
Step 3. Turn the microphone on (if necessary)
Don’t forget this stage or you’ll waste several minutes figuring out why you’re not hearing anything in your headphones.
Step 4. Switch the camcorder from the internal microphone to the XLR connection
This is very camcorder-specific (Figure 3, below)—sometimes performed via switches on the camera body, sometimes via menu options. Note that if the audio is too faint, I can boost XLR gain by 12 dB using the XLR Gain Up control.
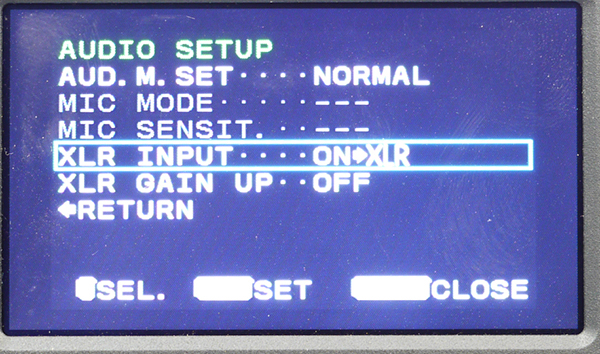
Figure 3. Changing the XH A1’s input to XLR.