Animating Effects with Per-Parameter Keyframes in Sony Vegas Pro 11
In this tutorial you'll learn how to make the most of Vegas's new by-parameter keyframing capabilities for effects plug-ins that ship with Vegas Pro 11 using the new Sony Text & Titles plug-in as an example.
One of the handiest little tricks to know about Vegas is that if you double-click on the slider, on pretty much any slider, any control, and any plug-in in Vegas, it will revert back to whatever the default setting is. Now, many times that's a zero. In the case of line-spacing, it's 1 because we're at a single line space. In most of your parameters, the default is going to be 0 or some low number.
Keyframing a Third Text Parameter
So let's click on Line Spacing, and we've added a new envelope, a new rubber band here, and we'll do the same thing. We'll double-click to set our second keyframe to be the same as the first because we don't want the effect to start until after the previous effect in tracking (Figure 15). Now, you can choose anything that you want, but for the purpose of our example, to explain how this works, this is how we're doing this.
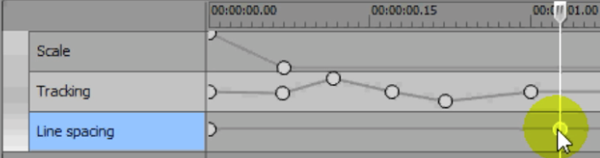
Setting the line-spacing animation to begin after the tracking animation stops
Next, let's manipulate our Line Spacing slider. You can get kind of creative with it. You can add as many keyframes as you want. And finally, we'll wind up back at square one (Figure 16). So let's do a Shift+B RAM Render here and see what that looks like. As you can see in the video tutorial clip at the top of the page, when you add all these keyframes, you'll have a lot going on.

More than enough line spacing keyframes
So the next time you pull up a plug-in, be it a video effect, a filter, a titling tool, I recommend you click on the Animate button and just try out a few things. Take a few minutes on each one of those parameters and see what you can come up with. Experiment, be creative, and I'll see you next time.
Related Articles
A quick look at the latest new features in Sony Vegas Pro 13, including the Vegas Pro Connect iPad app, a proxy-first workflow for mobile and 4K editors, and true, four-range loudness meters.
David McKnight demonstrates a quick, easy way to generate sharp-looking titles for your Vegas Pro projects that requires no additional plugins.
Vegas Pro 12, the new version of Sony's flagship NLE that debuted a few weeks ago, boasts several new features for online video production pros including simplified color matching, advanced mask creation and manipulation, and increased 64-bit support, while shipping as part of a new suite that includes Sound Forge Pro 10 and the HitFilm 2 Ultimate effects package.
In this fifth tutorial in our six-part series on Sony Vegas Pro 11, we're going to talk about the Render dialog box. Every project you work on, whether it's delivered on the web, or even on DVD or Blu-ray Disc, has to go through a rendering stage, so you'll find yourself getting quite familiar with it as you do more project. In Vegas Pro 11, Sony has added some new features to the Render dialog, and they've totally revamped the way that it works.
The new mixer layout in Sony Vegas Pro 11 makes editing audio for video in Vegas feel like you're using a pro hardware mixer. Vegas instructor David McKnight explains how it's done.
Sony Vegas instructor David McKnight continues his video tutorial series with a look at Vegas' new GPU Assist feature, which enables Vegas editors to leverage the processing power of supported NVIDIA and AMD video cards to get full-frame previews of loaded timelines and accelerate rendering with many popular codecs.
Sync Linking is a cool new feature in Sony Vegas Pro 11 that allows you to group clips of events and move and control them in the timeline with a single Master clip, while still being able to fine-tune subordinate clips within the group.