Review: Allen & Heath CQ-18T 16-Channel Digital Mixer
The introduction of the Allen & Heath CQ line revolutionized my audio setup, providing a compact, all-in-one solution without compromising essential features.
Page 1
The Allen & Heath CQ-18T (Figure 1) is a $1,200 digital soundboard that packs an unprecedented number of professional features into a compact all-in-one form factor. There are few trade-offs and overall, it offers an excellent value proposition that appeals to live stream producers, bands, and audio technicians alike. I previously built an audio solution that solved my most complicated audio requirements but the moment I watched a CQ-18T video on YouTube, I knew it was the digital soundboard I needed next. I ordered my first one that same day.

Figure 1. The Allen & Heath CQ-18T 16-Channel Digital Mixer
Building my Dream Audio Rig
I have been using the Behringer X-AIR X18 (Figure 2) and XR18 digital mixers since 2018. These models launched in 2014 and they have allowed me to take my A/V offerings within my video production company to the next level. They are very capable units that solved the problems I had dealing with multiple open microphones typical in conference panel discussions and working in rooms, that for a variety of reasons, are prone to feedback.

Figure 2. The Behringer X-AIR X18
The X-AIRs’ advanced auto mix feature provided meant I didn’t need to dedicate a technician’s full attention to riding audio fader levels, and the real-time analyzer helped me to pinpoint and eliminate reverberant frequencies that were feeding back.
Up until that point I was relying on analog soundboards, often paired with an analog graphic equalizer. These analog soundboards were great low-cost solutions but they lacked some of the advanced features that newer digital soundboards could offer. Before my A&H CQ mixers, I had six different soundboards. I knew I would only ever deploy 3 at most on a given day, but I needed multiple different solutions so that I wasn’t spec’ing a massive rig when a compact one would do and making sure I also had multiple of the more capable rigs as backup, or at times when there were concurrent needs. Now I only need 3 A&H CQ mixers, and the space savings in my studio—and the simplicity of my operators’ only having to master one solution—is a big advantage.
The big downside of the Behringer X-AIR units is that they aren’t all-in-one solutions, and they require a lot of additional equipment in all deployment scenarios. For starters, they require a computer or tablet for setup and operation as there are no faders, knobs, controls, or touchscreens on either the rackmount XR18 or desktop X18 units. The only physical controls on the X-AIR units are a headphone volume knob and the switch to toggle between the ethernet or Wi-Fi connection options, which in practice for me was always set to Ethernet because the internal Wi-Fi modules would drop connections frequently.
Operating the X/XR18 with a touchscreen device was possible but I preferred to use a control surface with motorized faders. My older Behringer controller didn’t talk directly to the soundboard, so I also needed a piece of software on the laptop to connect the two and to map controls. In the end, I built up a capable rig around my XR18 with a dedicated laptop, upgraded Wi-Fi router, and motorized faders. I housed it in an SKB 10x4 Compact Rig, along with four wireless microphone receivers, a power distro for the wireless receivers, a top shelf for the touchscreen laptop, and a drawer to house the microphones, a few cables, board tape, and an antenna.
I was proud of this build and it served me well, especially in my hybrid conference workflows. I had an especially complicated hybrid AGM production where I had to manage the mix-minus of two different concurrent remote audiences, both of whom were involved in the Q&A with the in-person audience. On stage, there were 10 panelists at the panel table and 2 moderators with dualling lecterns, each with their own gooseneck microphone. The Behringer XR18 was up to the task and made me feel good that I had assembled such a capable solution, especially when we realized that my professional audio technician’s go-to soundboard lacked both sufficient inputs and an auto mic mixer.
Why I Switched
So, if I had such a capable solution that could handle even my most complicated productions, why was I still looking for a different solution? The answer was simply that weighing in at 90 lbs., my audio rig was the heaviest single piece of equipment I operated that required lifting. With each lift from its shelf in my studio onto a dolly, into and out of my van, back on a dolly, onto a tech table, and the reverse on the way back, I was risking a back injury. Occasionally the audio rig was a team lift while onsite but mostly it was a single-person lift and I was the one doing the lifting.
I spent a lot of time researching alternate and more compact solutions that could replace my audio rig without compromising on the features I needed. My conclusion was that a better solution didn’t yet exist. I carried on with plans to use my Behringer solution for my complicated jobs and to substitute analog soundboards for less complicated jobs until something happened that would change the status quo. Then, ten days after I came to the conclusion that a better solution didn’t yet exist, Allen & Heath announced the CQ line. As soon as I watched a YouTube overview video, I knew I needed a CQ-18T and I ordered one that same day. I have since added a pair of CQ-12T models (Figure 3) and have started to process of selling all of my previous soundboards.

Figure 3. The Allen & Heath CQ-12T
What the Allen & Heath CQ Line Offers
Allen & Heath uses 96 kHz FPGA processing, which is also featured on their higher-end lines. So, the CQ line provides a happy balance of high-resolution audio with ultra-low latency. The $899 CQ-12T and $1,199 CQ-18T are all-in-one table-top solutions with optional rack ears, while the $999 CQ-20B (Figure 4) is a stage box. They feature 12, 18, and 20 inputs, respectively, but in my workflows I pay attention to the 10, 16, and 16 XLR inputs on each model, half of which are XLR/TRS combo jacks.
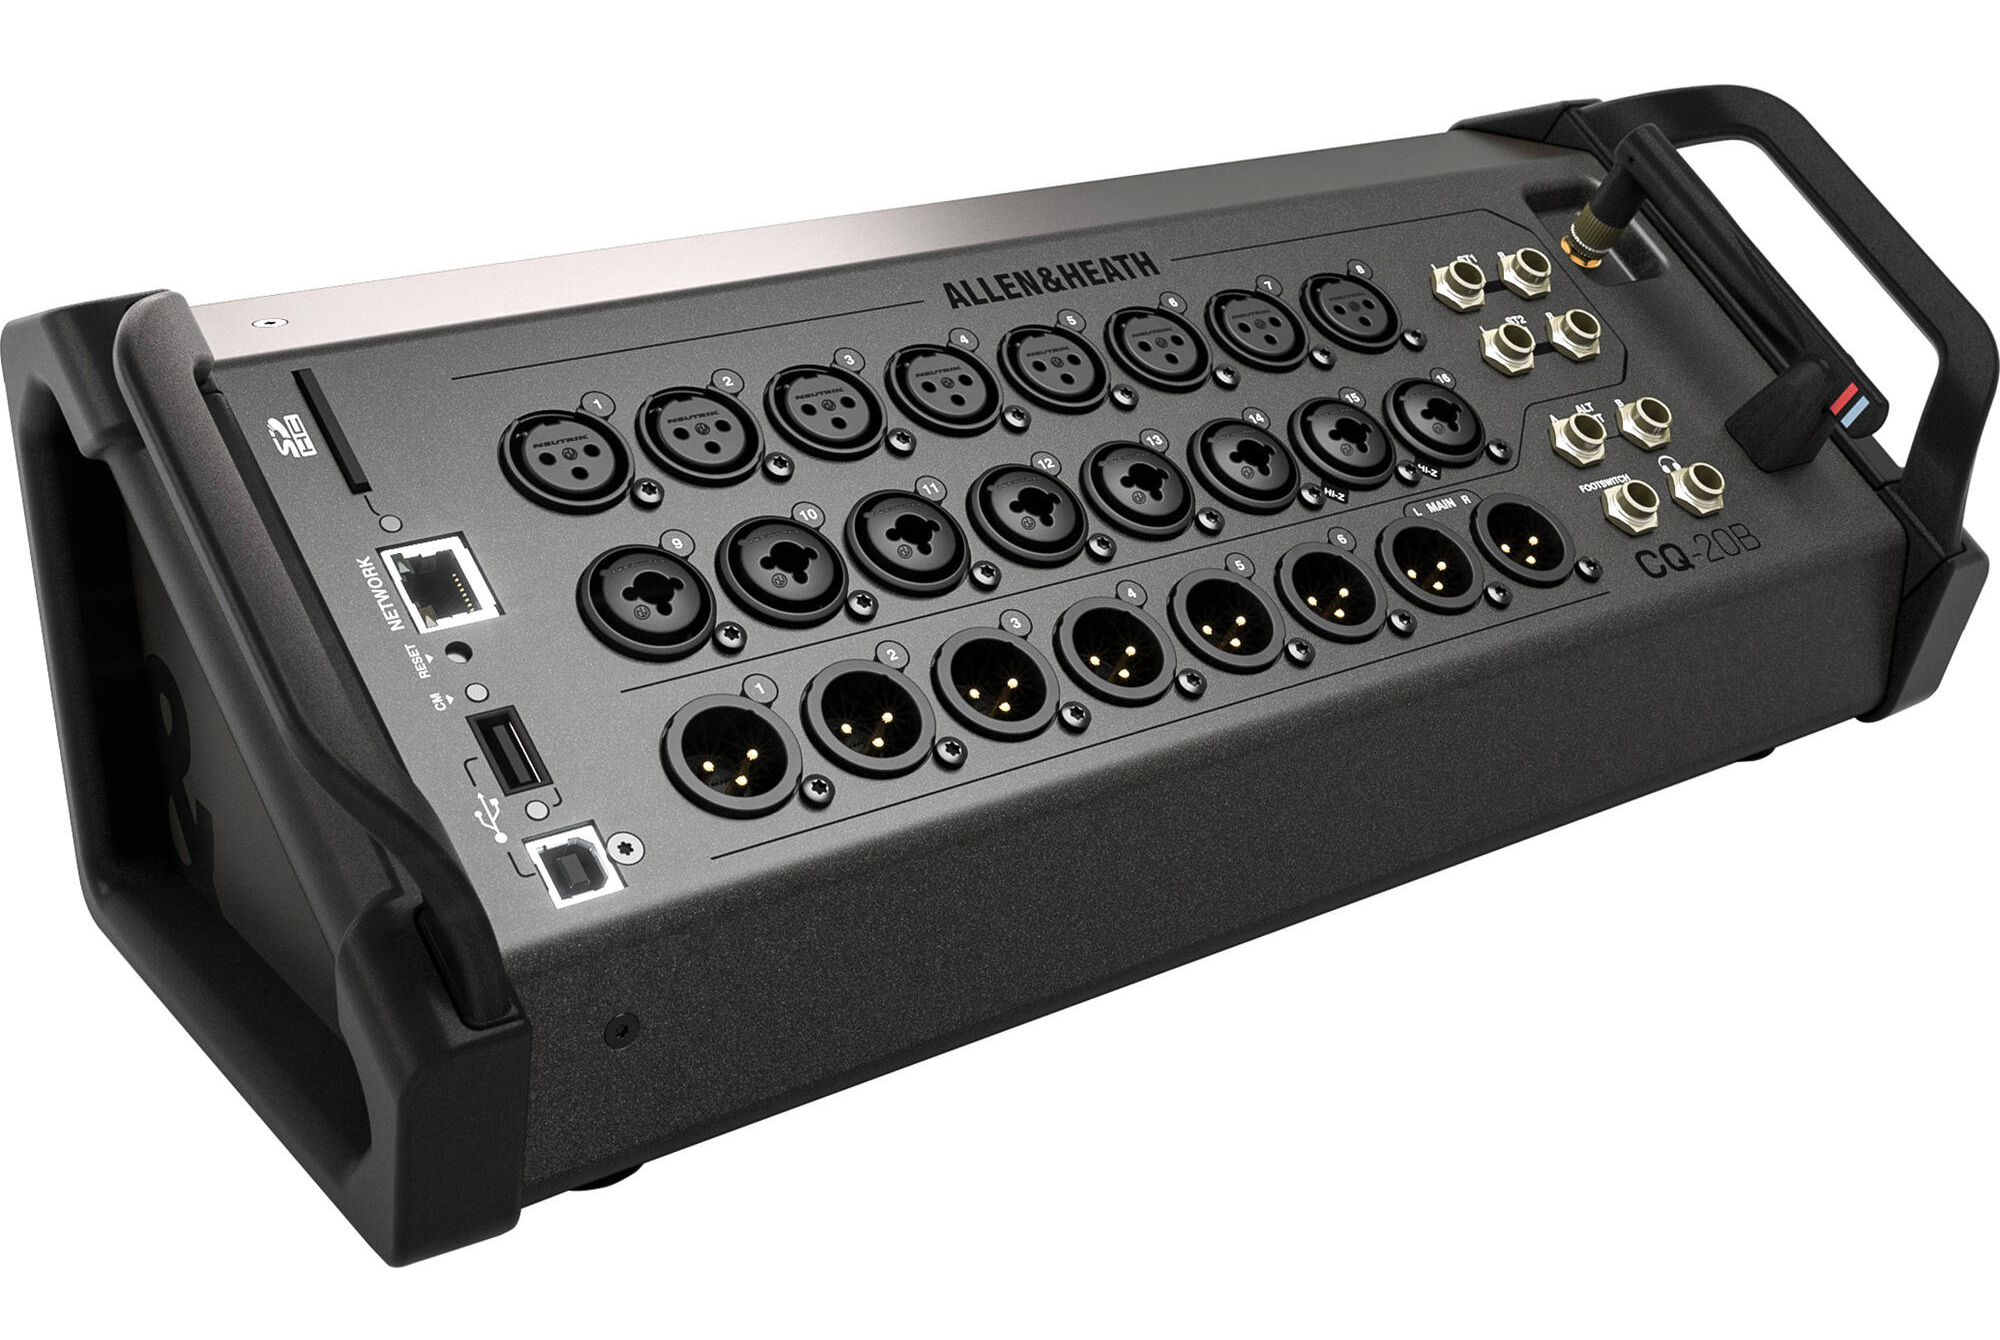
Figure 4. The Allen & Heath CQ-20B stage box
The T models have a touchscreen and control dials. The 18T has three control dials and two headphone outputs, while the 12T only has one of each. The B model has no screen or physical controls, and like the 18T, it has Wi-Fi. All models have 2 main outs and 6 monitor out channels. The T table-top models have XLR for the main outs and ¼” TRS for the monitor outs while the 20T stage box has XLR for all the outputs.
Physically, the CQ models are all lightweight. The 6.6 lb CQ-18T weighs a fraction of the 90-pound heft of my full Behringer X18 rig. To put that in context, the CQ-18T weighs less than a gallon of milk, while my old rig weighs about the same as a baby calf. The CQ-18T is small—it’s the same width as a 14" laptop and it’s only about 2” deeper.
But don’t let the CQ-18T’s diminutive size fool you into thinking that you need to accessorize it to actually use it. It doesn’t require a laptop or tablet connection, it doesn’t require a controller with motorized faders, and it doesn’t require an external Wi-Fi router. While I thought I would prefer to have faders to control the input levels, I found the 7” capacitive touchscreen monitor adequate to quickly change the levels on up to four sliders at a time, thanks to multi-touch support. Most of the time I toggle the input I want to adjust on the touchscreen and then use the rotary dial to fine-tune the levels with the same level of precision I was used to with faders. I now house my Sennheiser rackmount receivers, antenna, and microphones in a Gator G-Tour 6U half-rack case, which helps split the load and allows me to be more modular.
If you still want to control the CQ soundboards on other devices, the CQ MixPad app for iOS, Android, Windows, and macOS devices gives you full control over Wi-Fi or Ethernet (Figure 5).

Figure 5. The CQ MixPad app
Adding Wi-Fi to the 12T is as simple as connecting a Wi-Fi router to the ethernet port. I found I haven’t needed the ability to operate the CQ away from my tech table position yet but I have a tablet ready to go and I didn’t have any issues finding my way around that app as it has a very similar GUI to the touchscreen, which is more than I can say for the Behringer X/XR18 that has very different computer and tablet GUIs. There is even a CQ4You Android and iOS app that gives performers control over their own monitor mixes with their own cell phones. With 6 aux/monitor outputs, you can easily support the needs of most bands.
Limitations
Are there any deal-breakers with the CQ line? Not for me, but some workflows require larger solutions. CQ isn’t really targeting those workflows, but it’s bound to capture some of that higher-end market because it is so feature rich. One of the big standouts for me in terms of limitations is that it doesn’t support any form of digital snake or expansion by combining multiple units together. It also cannot be paired with any controllers with motorized faders, although this might change with third-party software enabling this, much the same way I paired my old rig with a non-natively supported controller.
Feature-wise, I was surprised that there weren’t any mute groups. This is one feature that I used on my Behringer rig in hybrid workflows to quickly mute groups of microphones, like the entire panel, when remote participants were asking questions. This isn’t a deal-breaker for me, but I also suspect it is a feature that can and (I hope) will later be added in a future update.
Initially I found the default settings to route the Main output to the USB output problematic, but I solved that issue by routing the USB audio to one of the Aux outputs, which gave me back independent control over the audio levels of both the Main and USB outputs independently.
Quick Channels
Quick Channels are an easy way to apply presets to both speed-up and make smart, advanced decisions with pre-set input settings. The Rock, Pop, Country, and Jazz templates set inputs for common configurations, like Drums, Bass, Piano, Guitar, Saxophone, Trumpet, and Vocals for Jazz bands. The Conference template is where I spend most of my time as it sets each linkable input channel to mono and the first bank of 8 inputs to Voice. When I select the Processing button I can access a set of EQ presets that correspond to the input selection.
For Conference, the Voice presets are Speech, Choir, Lectern, Lapel, Broadcast, Ess, Hi Pitch, and Lo Pitch. I can add a compressor and further control the Hi, Mid, and Lo gain. I can’t say I know exactly what is happening behind the scenes with these preset formulas, but I know I don’t know enough to have actually used different EQ settings in the past and having presets gives me professionals results similar to a colorist starting a grade with a LUT (lookup table), rather than having to build a grade from scratch.
Similar presets options are available for each different instrument option. When I changed one of my inputs from vocal to Wind/Brass, I was presented with the option in the processing tab to select a Woodwind (saxophone, clarinet, etc.) or Brass (trumpet, trombone, etc.) instrument and then my choice of five different sounds: Full, Clear, Bright, Dark, and Smooth.
Gain Assistant
The Gain Assistant automatically sets the gain for a selected input. You can set the gain one input at a time or select multiple inputs if you have multiple inputs of the same type. I do this when I have multiple condenser gooseneck microphones in a panel discussion setup. Unfortunately, the 48v Phantom Power cannot be toggled on in Multi Select mode. You still have to manually toggle between each input and activate the 48v with a long push before you can set the gain. This isn’t a big deal, but rather an opportunity for A&H to add some additional efficiency to the already quick setup in a future update.
The Gain Assistant increases the gain on an input during setup by increasing it to an optimal level. There is also an Auto Gain feature that can be selected that reduces the gain if the signal increases over time. Auto Gain only reduces the gain, it doesn’t ride the level back up again. I’ll go into that in a bit more detail shortly.
Feedback Assistant
Each of the main outputs and 6 monitor outputs have equalizer processing controls. A 20-band graphic equalizer (GEQ) enables multiple frequency adjustments, and when paired with a Real Time Analyzer (RTA), you can visually see the output signal and adjust accordingly to eliminate feedback. This method works, and 20 bands is plenty, but the width of the cut cannot be controlled, and the results are not exactly surgical.
The better option for my workflows is to combine a 4-band Parametric Equalizer (PEQ) with a 16 bank Feedback Assistant (FBA). The PEQ helps to shape the tone of the signal while the FBA automatically detects feedback and applies narrow filters to eliminate it. Selecting the Detect button gets the ball rolling, and you can start your regular method of ringing out the room and pointing microphone towards PA speakers to see which frequencies are going to feedback.
With the RTA turned on, you can see the audio waveforms and which ones hit the 0 on the scale, indicating feedback. Almost instantly a narrow filter notches the problematic frequency and sets a cut amount. The FBA can be operated in a fixed set-once mode or a live mode that can actively add additional filters if later needed. When set to live mode, notches will slowly decrease the cut amount, based on the setting in the Live Recovery dial, until the filter is no longer active.
Automatic Mic Mixer (AMM)
When you have multiple open microphones like you would with a panel discussion, you end up amplifying a lot of room tone, and this isn’t a good thing. The old school way to avoid too much noise floor is to constantly ride the mic levels up and down when the mics are in use or not. This works fine when you only have a few microphones, and everyone takes turns and speaks one at a time. Eventually, you reach a tipping point where an operator can’t keep up or is spending too much of their focus on riding mic levels. When you are also operating a video mixer and webcast encoder, this can be problematic.
An AMM automates the process of riding levels and this allows for higher gain before feedback for live sound reinforcement and can reduce comb filtering in recordings. The CQ line of mixers lets you toggle on or off the AMM for each input, set a priority level to each input, and toggle on or off the follow fader to adjust the input send level to the Main LR (Figure 6).

Figure 6. The CQ l18T’s automatic mic mixer (AMM)
The AMM can also be assigned as the source point for the USB, Bluetooth, and 6 monitor outputs.
Mix-Minus and USB Outputs
By default, the CQ-18T has the Main LR assigned as the source for channels 23/24, which is the USB output. Immediately, I ran into issues trying to set both my Main LR PA speaker levels and my USB output levels in this default configuration as the two levels were linked. It sort of worked if I first set my USB levels and then adjusted the PA speakers volume manually but that left a lot to be desired as adjustments to the house audio had to be done by changing the volume on the PA speakers.
The solution was to switch the USB channel assignment to Out1/2 (outputs 1 and 2) so that I could independently control both the Main and the USB output levels. In the Out1/2 settings I selected Stereo Link to allowed me to receive a stereo L/R signal over USB instead of only a left channel in my stereo workflows. I also set the Input Send Levels as Post Fader so that level adjustments on any given input would be mirrored on both the Main and USB signals. Having the USB channel tied to the Out1/2 means I could choose which inputs to send to the USB output (which was connected to vMix) and this can be a different mix from the Mains.
Setting up a mix-minus was relatively easy too, although in my hybrid workflow I was operating audio busses on the CQ-18 and in vMix. In my workflow, I had two Zoom audiences who needed to hear the program mix, minus their own audio back. The program audio consisted of 12 microphones from presenters and in-person attendees. There was also some pre-recorded video with audio.
The live microphones were connected directly to the CQ-18T while the pre-recorded video with audio and live Zoom audiences were connected to vMix, via the HDMI output on the presenter laptop with the Zoom speaker set to the HDMI output.
In vMix, I mixed four audio busses. The Main was my recording, the A Bus was my send to the Zoom Voting audience, the B Bus was my send to the Zoom Non-Voting audience, and the C Bus was my send to the CQ-18T for sound reinforcement on the PA. I used virtual audio cables for the additional busses in vMix.
The important part of audio routing is to not duplicate or loop audio from a source back to itself, and the new Audio Bus Manager in vMix (Figure 7) is really helpful with this task. So while I was recording all my audio inputs on the mains, the A Bus (Zoom Voting) was sent the CQ-18T USB signal (Out1/2) and the Zoom Non-Voting audio. The B Bus (Zoom Non-Voting) was sent the same CQ-18T USB signal and the Zoom Voting audio. Bus C (PA Speakers) were sent both the Zoom Voting and Zoom Non-Voting audio but not the CQ-18T USB audio because this was already being sent to the PA Speakers on the CQ-18T’s Mains.

Figure 7. vMix’s new Audio Bus Manager
I sent the C bus to the CQ-18T over USB while the A and B Bus audio to the corresponding two Zoom audiences were output as external outputs in vMix on a Thunderbolt 3 connected PCIe enclosure with a Blackmagic DeckLink Duo2 PCIe card. An HD-SDI cable connected the output to a Magewell USB capture card and showed-up on the Zoom host computer as a video and audio input.
Conclusion
The introduction of the Allen & Heath CQ line revolutionized my audio setup, providing a compact, all-in-one solution without compromising essential features. In the CQ-18T and CQ-12T, I found lightweight alternatives to my cumbersome audio rig, significantly reducing setup complexity, and physical strain.
The CQ line's combination of advanced features such as Auto Mic Mixing and a Feedback Assistant makes it an ideal choice for a wide range of audio production needs. While not without limitations, such as the lack of support for digital snakes or expansion through multiple units, the CQ line's compactness and feature-rich design outweigh these drawbacks for many users.
Overall, the Allen & Heath CQ line represents a significant advancement in digital soundboard technology, providing professional-grade functionality in a compact and accessible package. My transition to these mixers has not only simplified my setup but also enhanced the quality and efficiency of my audio production workflows.
Page 1
Related Articles
Today's video producers are now able to leverage new technologies that can really help with the live streaming production—especially on-location. By utilizing what are commonly called "podcast mixers," streaming producers can deliver a bit more polish, while also gaining better flexibility in production.
Mixing audio for a video recording or live stream involves many of the same techniques and equipment, but each has different production standards and you don't have to worry with live sound reinforcement using loudspeakers. In this article, I explain my approach to mixing audio for both of these environments at the same time.
VideoRx CTO Robert Reinhardt discusses best practices for setting up audio and video mixing for live-streamed events in this clip from his presentation at Streaming Media West 2019.
In 2014, I made a presentation at Streaming Media West covering all the various ways an "Audio Mixing Ninja" gets the best audio possible. When it comes to live audio for streaming, there are a few additional wrinkles to consider that don't come into play with audio recording when you aren't streaming live.
This article compares a range of sub-$100, sub-compact mixers that can help you capture top-quality audio at events where you don't need bulkier, more expensive mixers with more inputs than you may need.