Tutorial: Creating a Two-Camera Interview from a One-Camera Shoot
One-on-one interviews shot with two cameras pack a lot more punch than single-camera interviews, simply because they allow you to cut from two-shots of both participants to one-shots focused on the interviewee without distracting and unprofessional-looking zooms. So, how do you get that two-camera look when you've only got one camera available? This tutorial explains how, using Adobe Premiere Pro CS6 for the edit.
One of the constants of our two stateside Streaming Media shows over the last several years has been the Red Carpet Interviews, a series of interviews we do with speakers, vendors, and other industry pundits that we wouldn't otherwise be able to round up in the same space the rest of the year. For several years, we outsourced production of these interviews before bringing the project in-house at Streaming Media East in New York in May, and then again at Streaming Media West in Los Angeles in December.
For me, this meant putting together a kit and a workflow to pull off two-camera shoots and edits on a tight schedule and tighter equipment budget, which presented some interesting challenges. For the interviews at Streaming Media West in November, it meant two different workflows for two different days of shooting. On the first day of the show, I had two very different cameras (a traditional Panasonic 3-chip handheld, the AG-HMC40, and a large-sensor E-mount Sony NEX-VG20H) to work with. For the interviews on Day Two, I unexpectedly lost the Panasonic when the colleague who had brought it from New York took it home. Before my next project of this sort, I'll track down a second used VG20 and avoid a lot of these issues, but for me, as I suspect for many readers, it takes time to get the budget to assemble the kit I want.
In the meantime, I was left with two kinds of sleight of hand to pull off. For Day One, that meant color-matching the footage from the Panny and the Sony (nothing new there to readers with mixed-gear set-ups). But for the Day Two interviews, I was looking at something a little different: how to replicate the two-camera experience of the Day One interviews with only one camera's footage.
My approach to using the two-camera setup for these interviews is pretty conventional. Frame one camera as a two-shot (in this case, the Panasonic HMC40) and the other as a one-shot tight on the interviewee (in this case, the Sony VG20H), then (for the most part) use the two-shot for the questions and cut to the one-shot for the answers. Except for the addressing some persisting color temperature differences between the two cameras, simple stuff.
The Strategy
But the most pressing question was how to replicate this on Day Two so the interviews from both days looked as consistent as possible, as if they were shot and edited in the same way. I thought back to something Michael Kolowich of Diginovations and KnowledgeVision had told me: Most talking-head video on the internet gets played as a partial-screen image on computers (and obviously in smaller player windows on mobile devices), and doesn't require the player window size or detail that you need in, say, a screencam. So for many reasons, encoding the video at a resolution of 640x360 isn't just sufficient; it's even preferable for playback at lower bitrates.
So I continued to shoot in 1920x1080, with the assumption that I would have plenty of resolution to play with in post when it came to framing two different shots from the footage I captured: a 640x360 two-shot of the interviewee and interviewer, and a tight 640x360 one-shot of the interviewee.
The Preset
To begin this project in Adobe Premiere Pro CS6, the first thing I needed to do was create a 640x360 Sequence Preset. In the New Sequence dialog, I single-clicked the AVCHD 1080p60 setting, then clicked the Settings tab at the top of the window. In the Settings tab, I set the Editing Mode field to Custom, then adjusted the settings as shown in Figure 1, below.
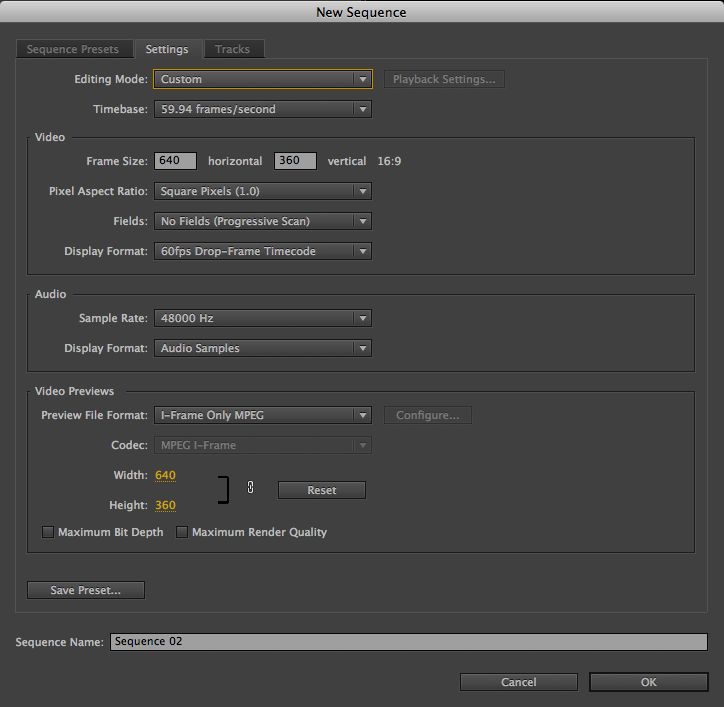
Figure 1. Adjusting New Sequence settings to create a 640x360 frame
Next, I clicked the Save Preset button so that I'd have this preset available to use for all of my Day Two edits. This brought up the Save Settings dialog (Figure 2, below). There, I gave my preset a name and description to make it recognizable in the future in case I find myself in this predicament again, and saved the settings.
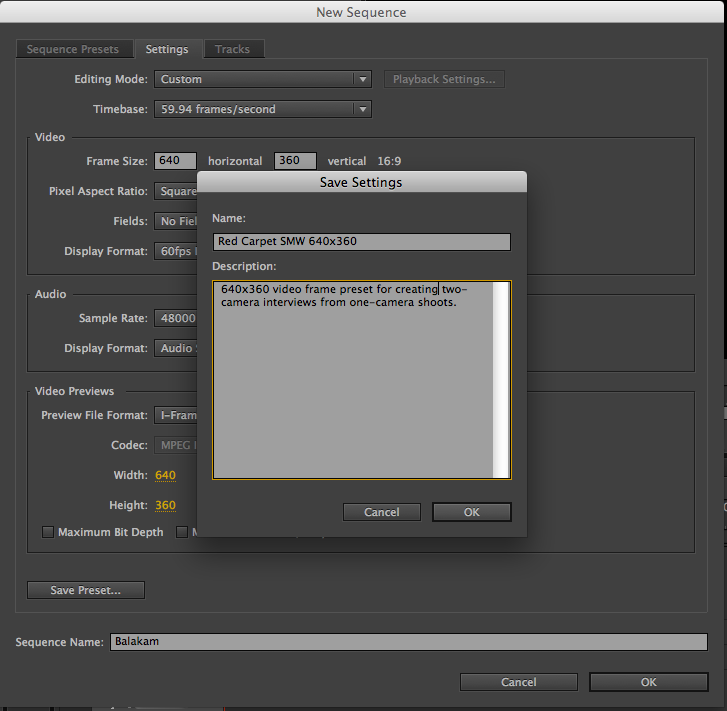
Figure 2. Naming and describing the preset
The new custom preset now appears in the Custom folder in my Sequence Presets tab, as shown in Figure 3 (below). I select it and click OK to select it.
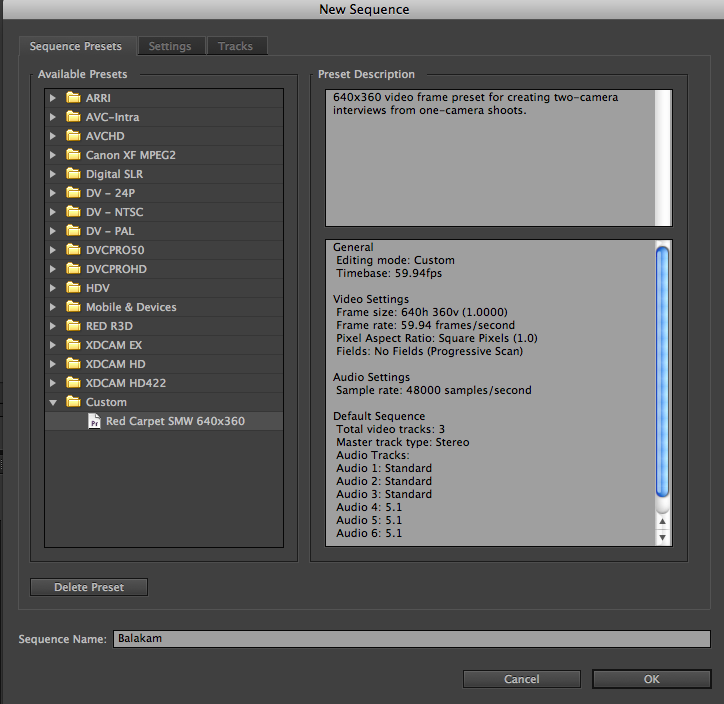
Figure 3. The saved preset