Tutorial: Sorenson Squeeze 9
Squeeze offers great single- and multiple-file encoding performance, excellent quality, and a range of features that other encoders in its class simply can't match. Here's a look at how Squeeze works and how to leverage some of its key features.
Sorenson Squeeze is a highly functional cross-platform desktop transcoder that l use almost every day. That’s because it goes beyond simple file transcoding with a range of features that most competitive products can’t match.
Squeeze is regularly $549 for the base version, and $749 for Squeeze Pro, but both versions are on sale now along with a special upgrade offer from this video's sponsor, Videoguys.com.
In this tutorial, I’ll introduce you to Squeeze, and show you the features that distinguish it from other desktop encoders.

Workflow
First, let’s get familiar with the product and workflow.
Figure 1 (below) shows the main Squeeze UI. You can import a file or multiple files into the program using the Import File control indicated in Figure 1, or via drag and drop (Figure 2, below Figure 1). You can also capture video from connected devices via the Capture button, or set up watch folders by clicking the Watch Folder icon.
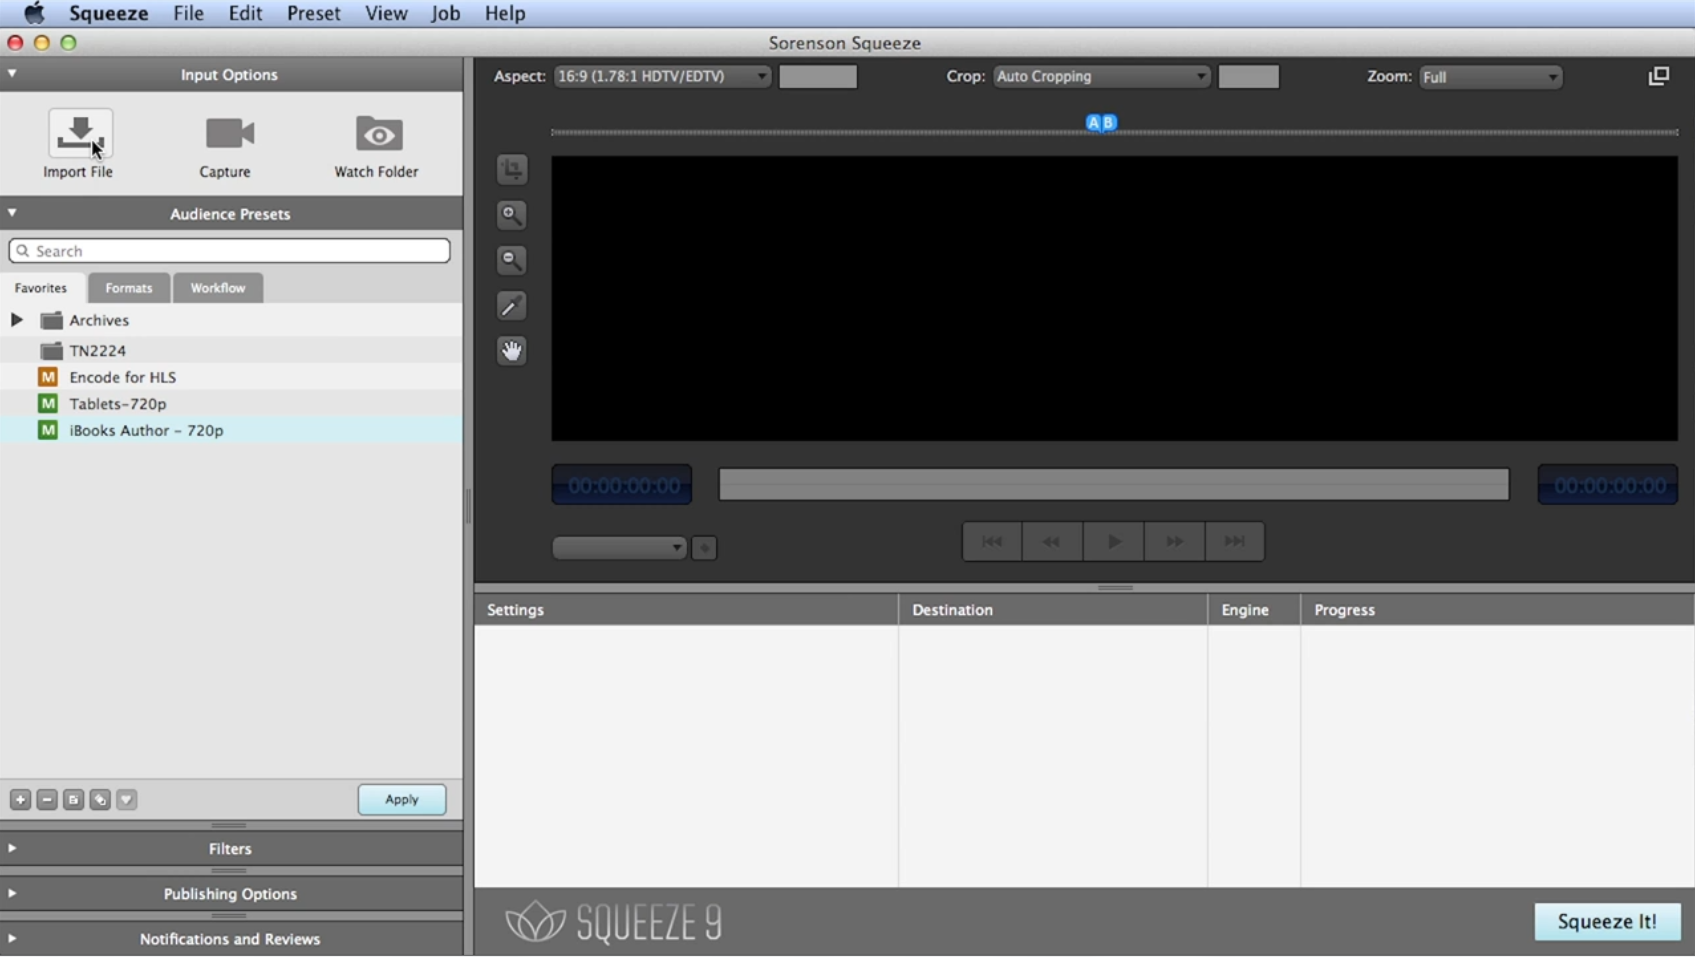
Figure 1. Click Import File to import a video clip into Squeeze. Click the image to see it at full size.

Figure 2. Adding files via drag and drop. Click the image to see it at full size.
From the Batch window on the left side of the UI (Figure 3, below), you can drag one or more presets onto each file, either as a group or one by one. Then you can right-click to customize the preset (Figure 4, below Figure 3), and click Squeeze It! (lower-right corner) to encode the file.

Figure 3. Choosing a preset for batch encoding.

Figure 4. The Presets dialog, where you customize encoding presets to your liking. Click the image to see it at full size.