Tutorial: Removing Video Noise with the Neat Video Plug-in
In this tutorial, Jan Ozer demonstrates how you can use the Neat Video plug-in to remove noise from video, improving output quality for all outputs.
In this tutorial I'll demonstrate how you can use the Neat Video plug-in to remove noise from video, improving output quality for all outputs.
Shooting in low-light conditions is a reality for most of us. A few weeks ago I shot a speech by Democratic congressional candidate Anthony Flaccavento at a local incubator facility, and as you can see in Figure 1 (below) and in the video above, there's lots of noise in the background, and even on the candidate's face. That's because I had to boost gain to achieve the proper exposure.
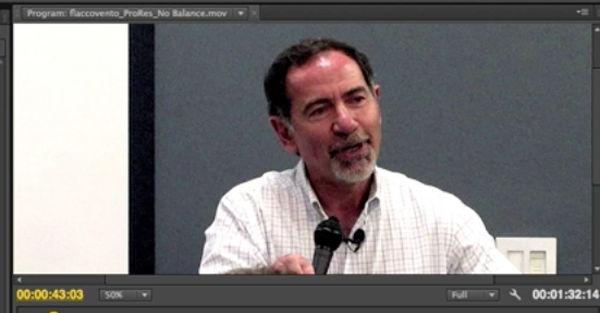
Figure 1. Note the video noise in the background and on the subject's face in this clip.
Applying the Neat Video Filter
Fortunately, gain-related noise—which is very common, and precisely the problem we're dealing with here—is exactly what the Neat Video filter was designed to correct. By way of background, the filter, which you can find by Googling "Neat Video filter," starts at about $50. It supports popular pro NLEs like Premiere Pro, Final Cut Pro (including FCP X), and Vegas (as well as Adobe After Effects).
Once you've purchased and installed the plug-in for your NLE of choice, you apply it to the clip as you would any other included or installed filter. Figure 2 (below) shows how it's selected in Premiere Pro CS6.
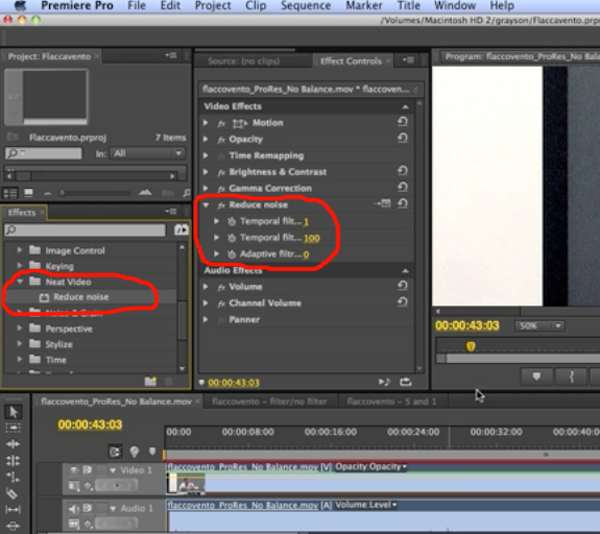
Figure 2. Selecting the Neat Video filter and applying it to the noisy clip.
Creating a Noise Profile
Then you click the Settings button (Figure 3, below), which brings up a full-screen view.
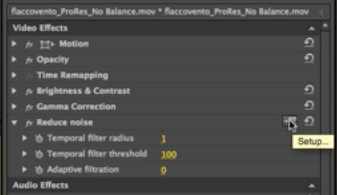
Figure 3. Clicking the Settings button.
If you've worked with video that you've created a profile for in the past, click the Load Profile button (Figure 4, below) to load the profile. When you have a number of clips that have the same noise issues, saving a profile—as with audio noise—allows you to save and later reload a noise file from a comparable clip.
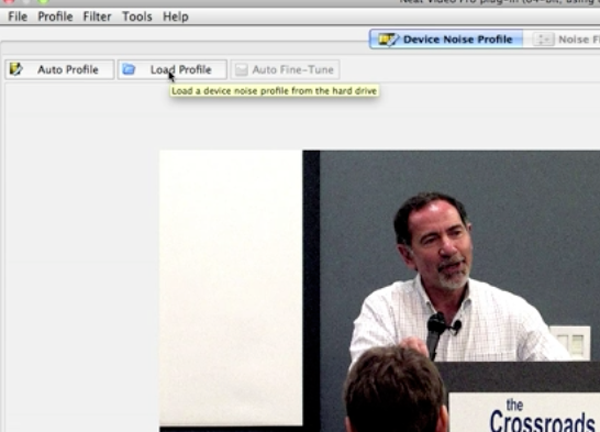
Figure 4. The Load Profile button
If it's the first time you've worked with a particular video, click Auto Profile instead (to the left of the Load Profile button in Figure 4, above). This tells the Neat Video filter to scan for an area in the image that's flat and has little detail, and thus is a region where it's easy to tell whether the changes it detects between frames are noise, or true motion in the frame. In the section of the frame shown in Figure 5 (below), there's no true motion, so all the motion relates to noise that the filter will attempt to eliminate.
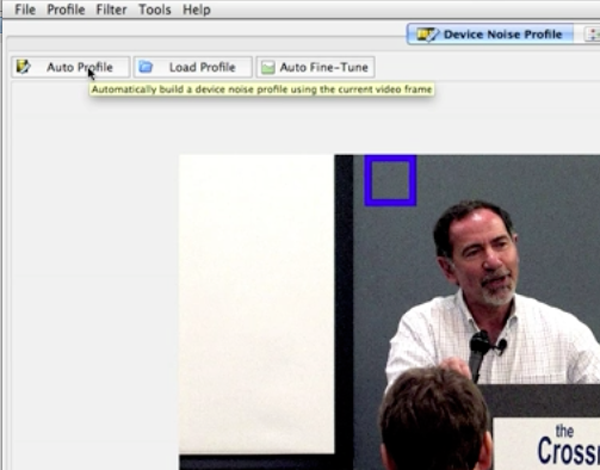
Figure 5. The blue square identifies a section of the frame with no true motion to identify and isolate the video noise.
Over on the right you'll see the Device Noise Profile settings for the clip (Figure 6, below). Here it's key to make sure that the quality setting is over 60, which means that the filter found a region that will enable it to accurately discriminate between noise and motion.
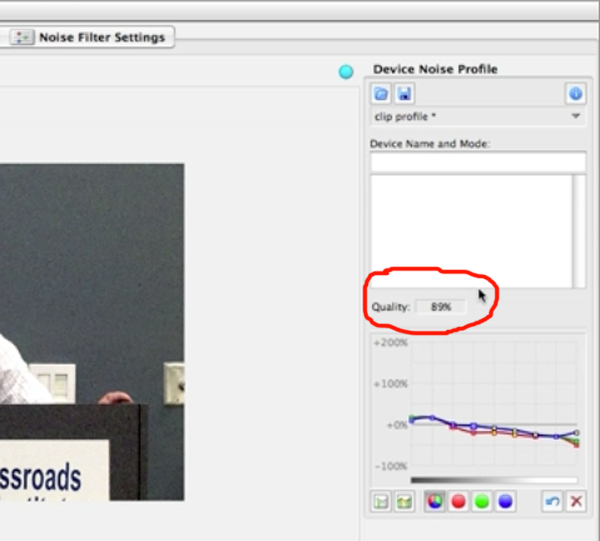
Figure 6. Device Noise Profile settings
If you don't have a flat region in the video—if all your video looked like the section of the image highlighted in Figure 7 (below)—then you'll have to set some of the original noise-related settings manually. We'll look at how to do that a bit later.
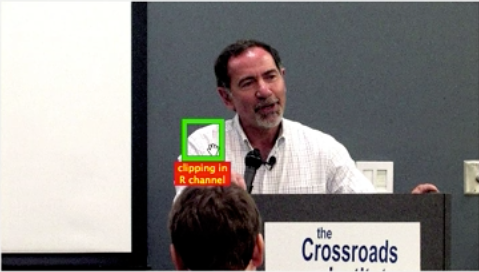
Figure 7. A section of the video that's not flat enough to use for auto-profiling
Related Articles
Magic Bullet Denoiser II is the latest version of Red Giant's popular plug-in for removing video noise from troublesome footage. Event and documentary filmmaker tests the plug-in on two different clips and shows before-and-after results and assesses Denoiser's usability, effectiveness, and rendering speed.
In this tutorial you'll learn how to maximize the brightness and contrast of your video in Adobe Premiere Pro CS6 using the Brightness, Contrast, and Gamma Correction controls for effective and balanced adjustments.
The histogram and the waveform in Apple Final Cut Pro X are effective, easy-to-master tools that provide the clear input you need to diagnose and fix the contrast issues in your video simply and intelligently. In this video tutorial, video editing and encoding expert Jan Ozer explains how they work.
Video encoding and editing expert Jan Ozer provides three useful tips that will enhance your workflow and get you out of some editing jams in your Adobe Premiere Pro projects: editing audio without unlinking; Fill Left and Fill Right to create stereo audio; and creating nested sequences for smoother edits and creating reusable set pieces in your projects.